Key Takeaways
- Use the right templates and dimensions in Canva to create videos easily.
- Adding clips to your Canva project is easy and efficient, ensuring your footage imports correctly.
- Edit the colors and content of your video clips in Canva for a professional finish, including transitions and image adjustments.
Whether creating Reels or editing videos for YouTube, Canva is a great mobile app for putting together your smartphone footage. Today, I’ll show you my entire process for creating and editing videos using this tool. You can follow along if you have a free or paid subscription.
1Using the Right Templates or Dimensions
To successfully create anything in Canva, you must have the right foundations. You can use a template if you want to add more of an artistic twist to your content; for those of you who would prefer to start from scratch, you can use custom dimensions instead.
If you’re posting on a specific platform, it’s worth checking the dimensions in advance. Canva will help in this respect; you’ll find presets for Reels, TikTok videos, and more, just use the search bar to find what you’re looking for. In this instance, I’m going to use the Video (1080p) dimension template and start from scratch.
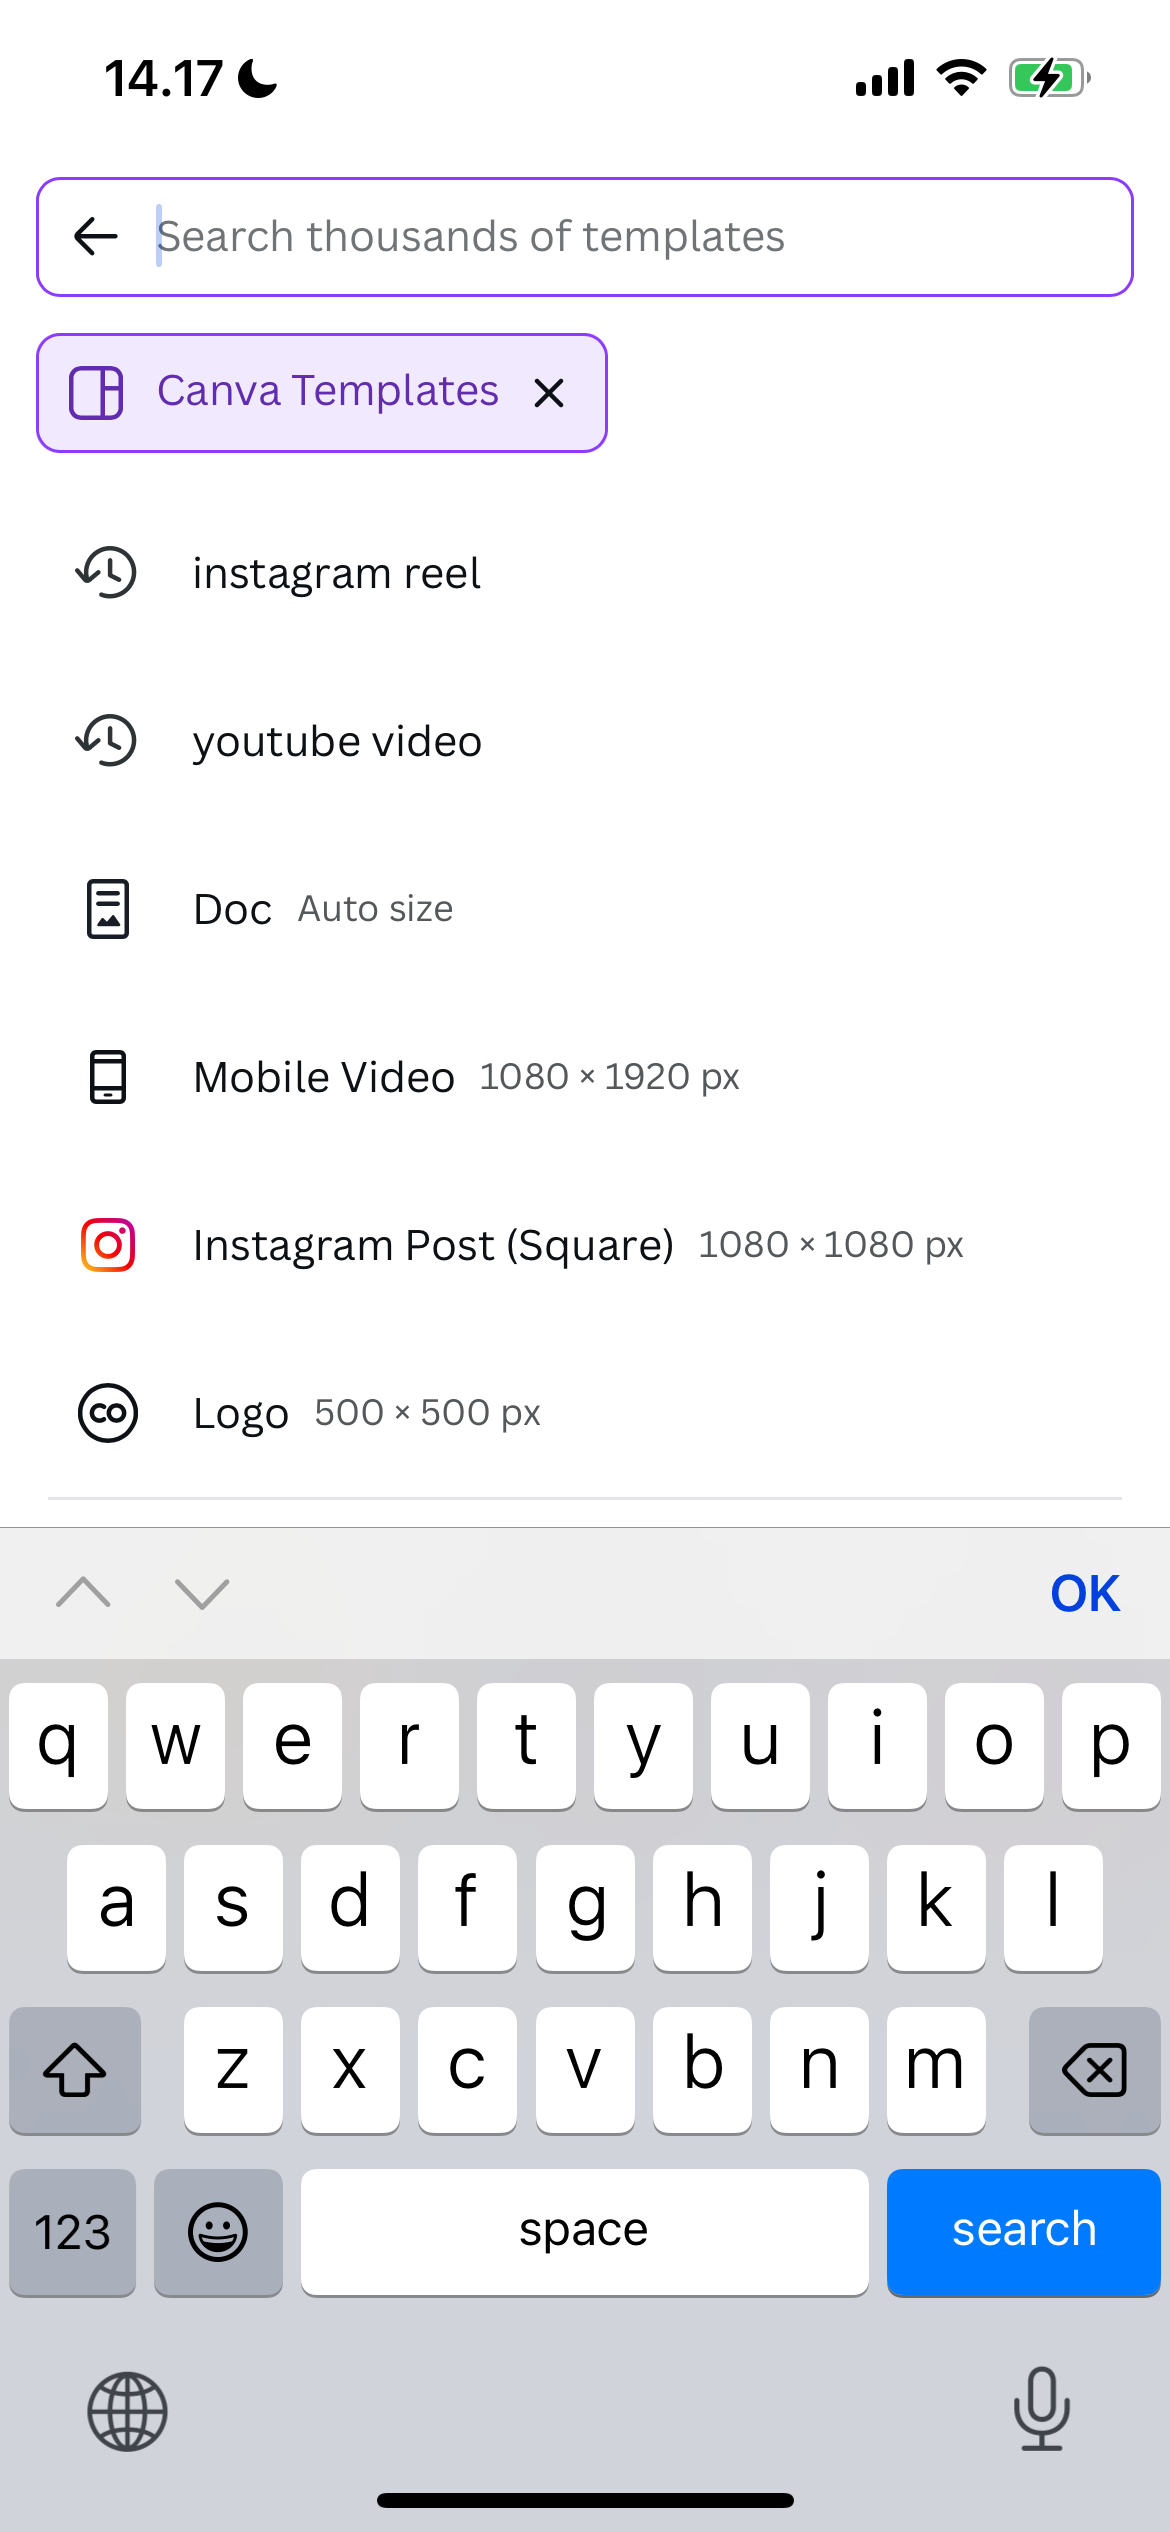
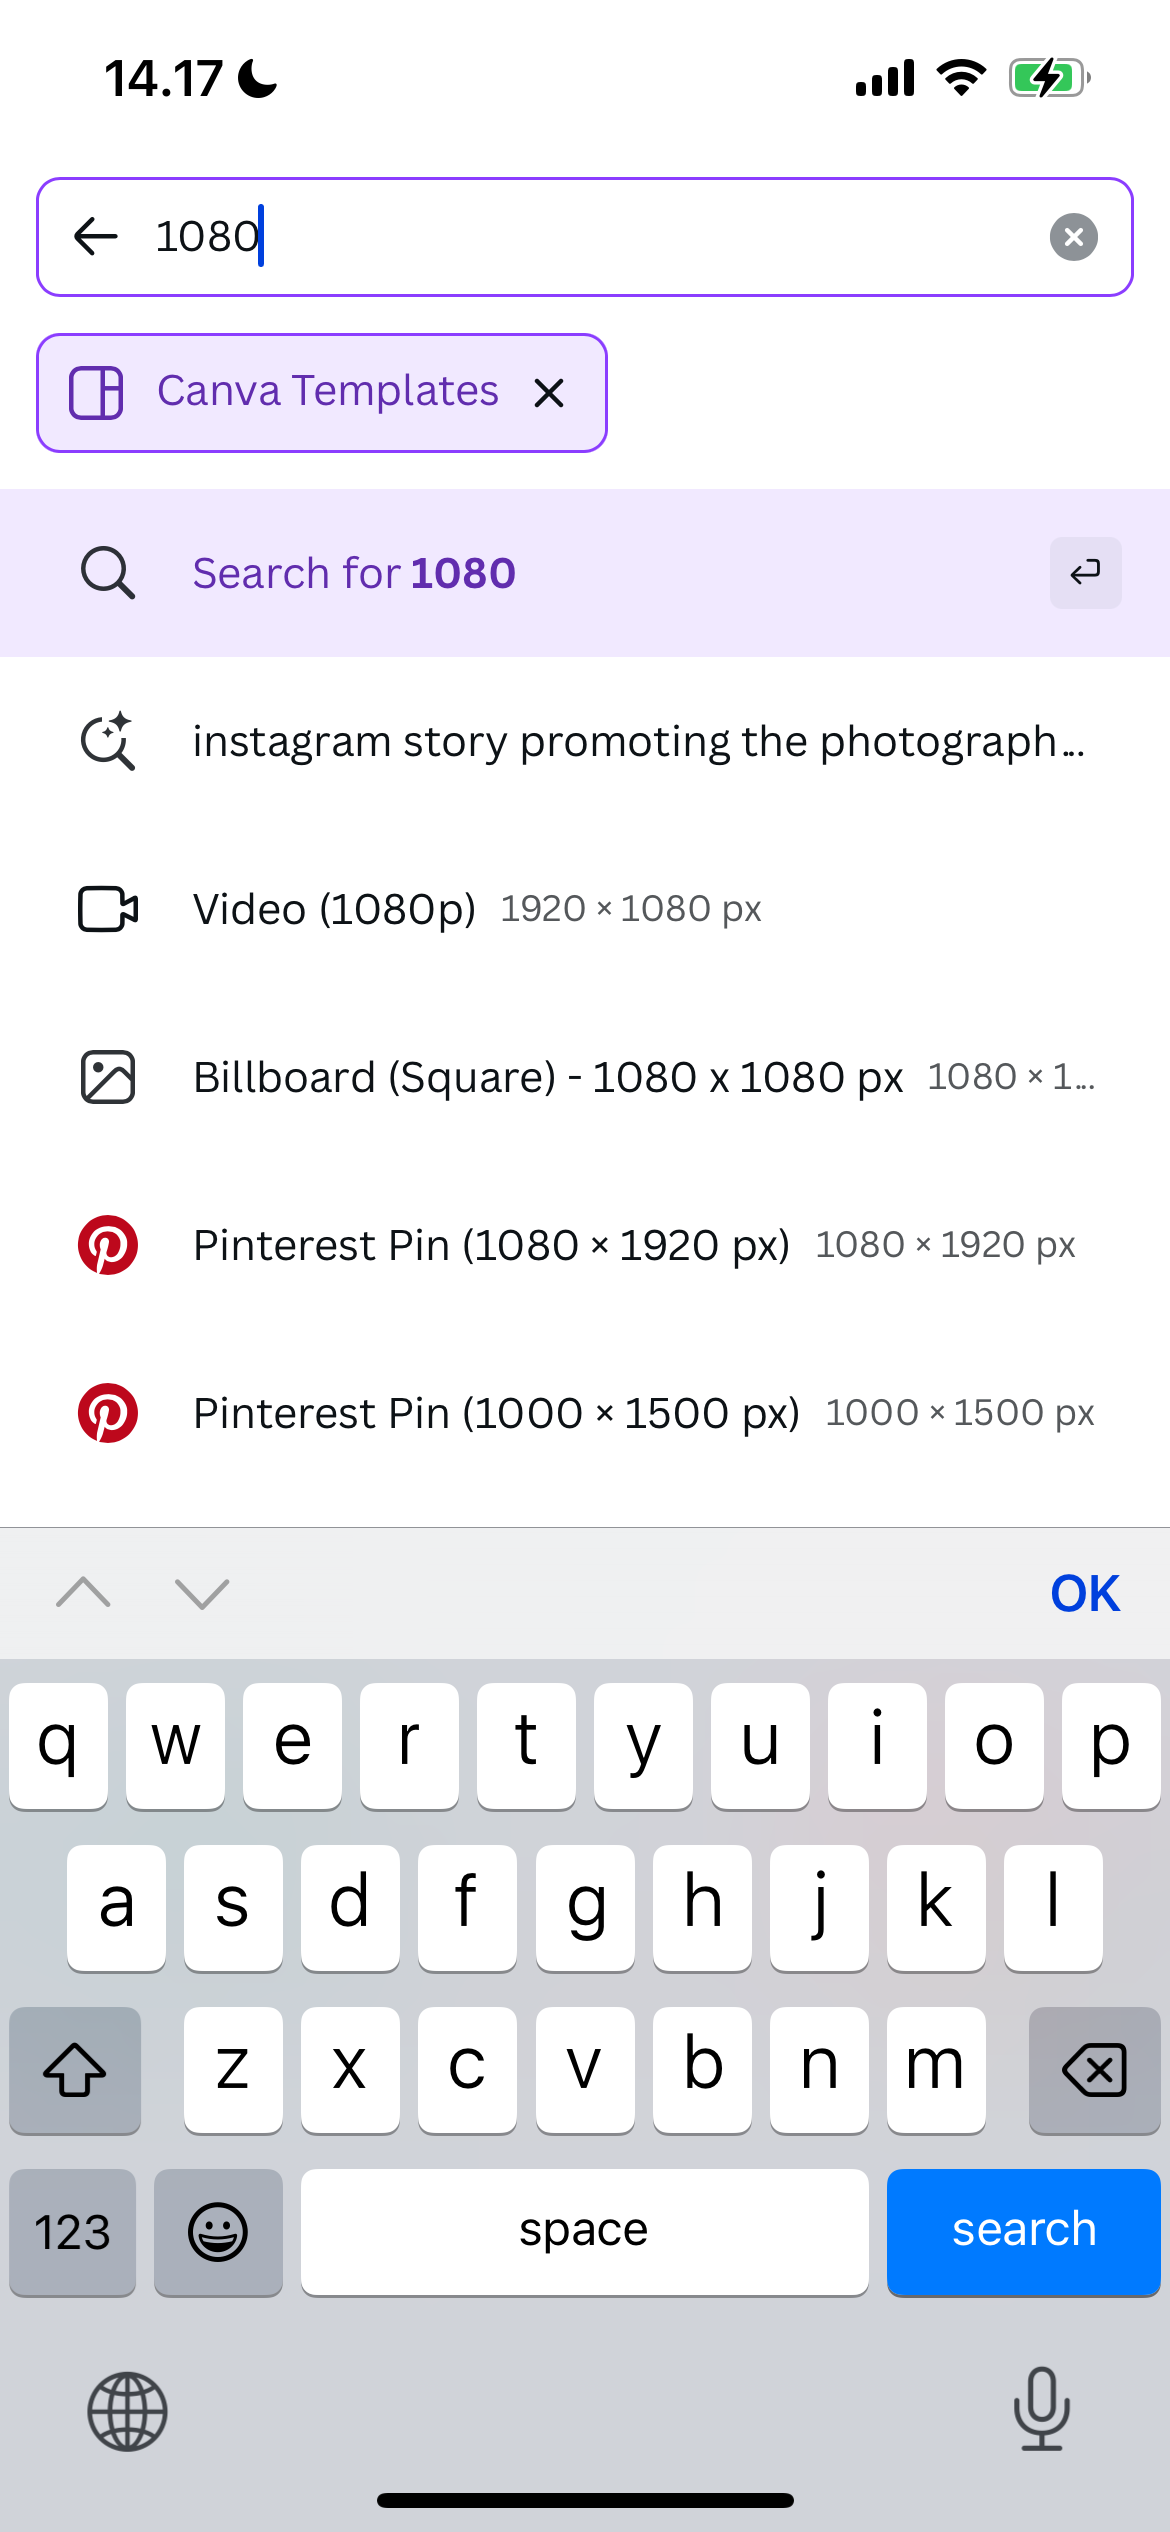
As a rule of thumb, use 1920 x 1080 for landscape videos and 1080 x 1920 for portrait ones. Learning about video aspect ratios is also a good idea.
2Adding the Clips to My Canva Project
Once I’ve chosen the starting points for my video, the next step is to import the clips I plan to use. All of the footage I wish to use is already on my smartphone, which makes this easier. However, if I wanted to edit clips from a DSLR via Canva for mobile, I’d import them on my computer first and then open the Canva app on my smartphone.
Here’s how to add clips to your Canva project:
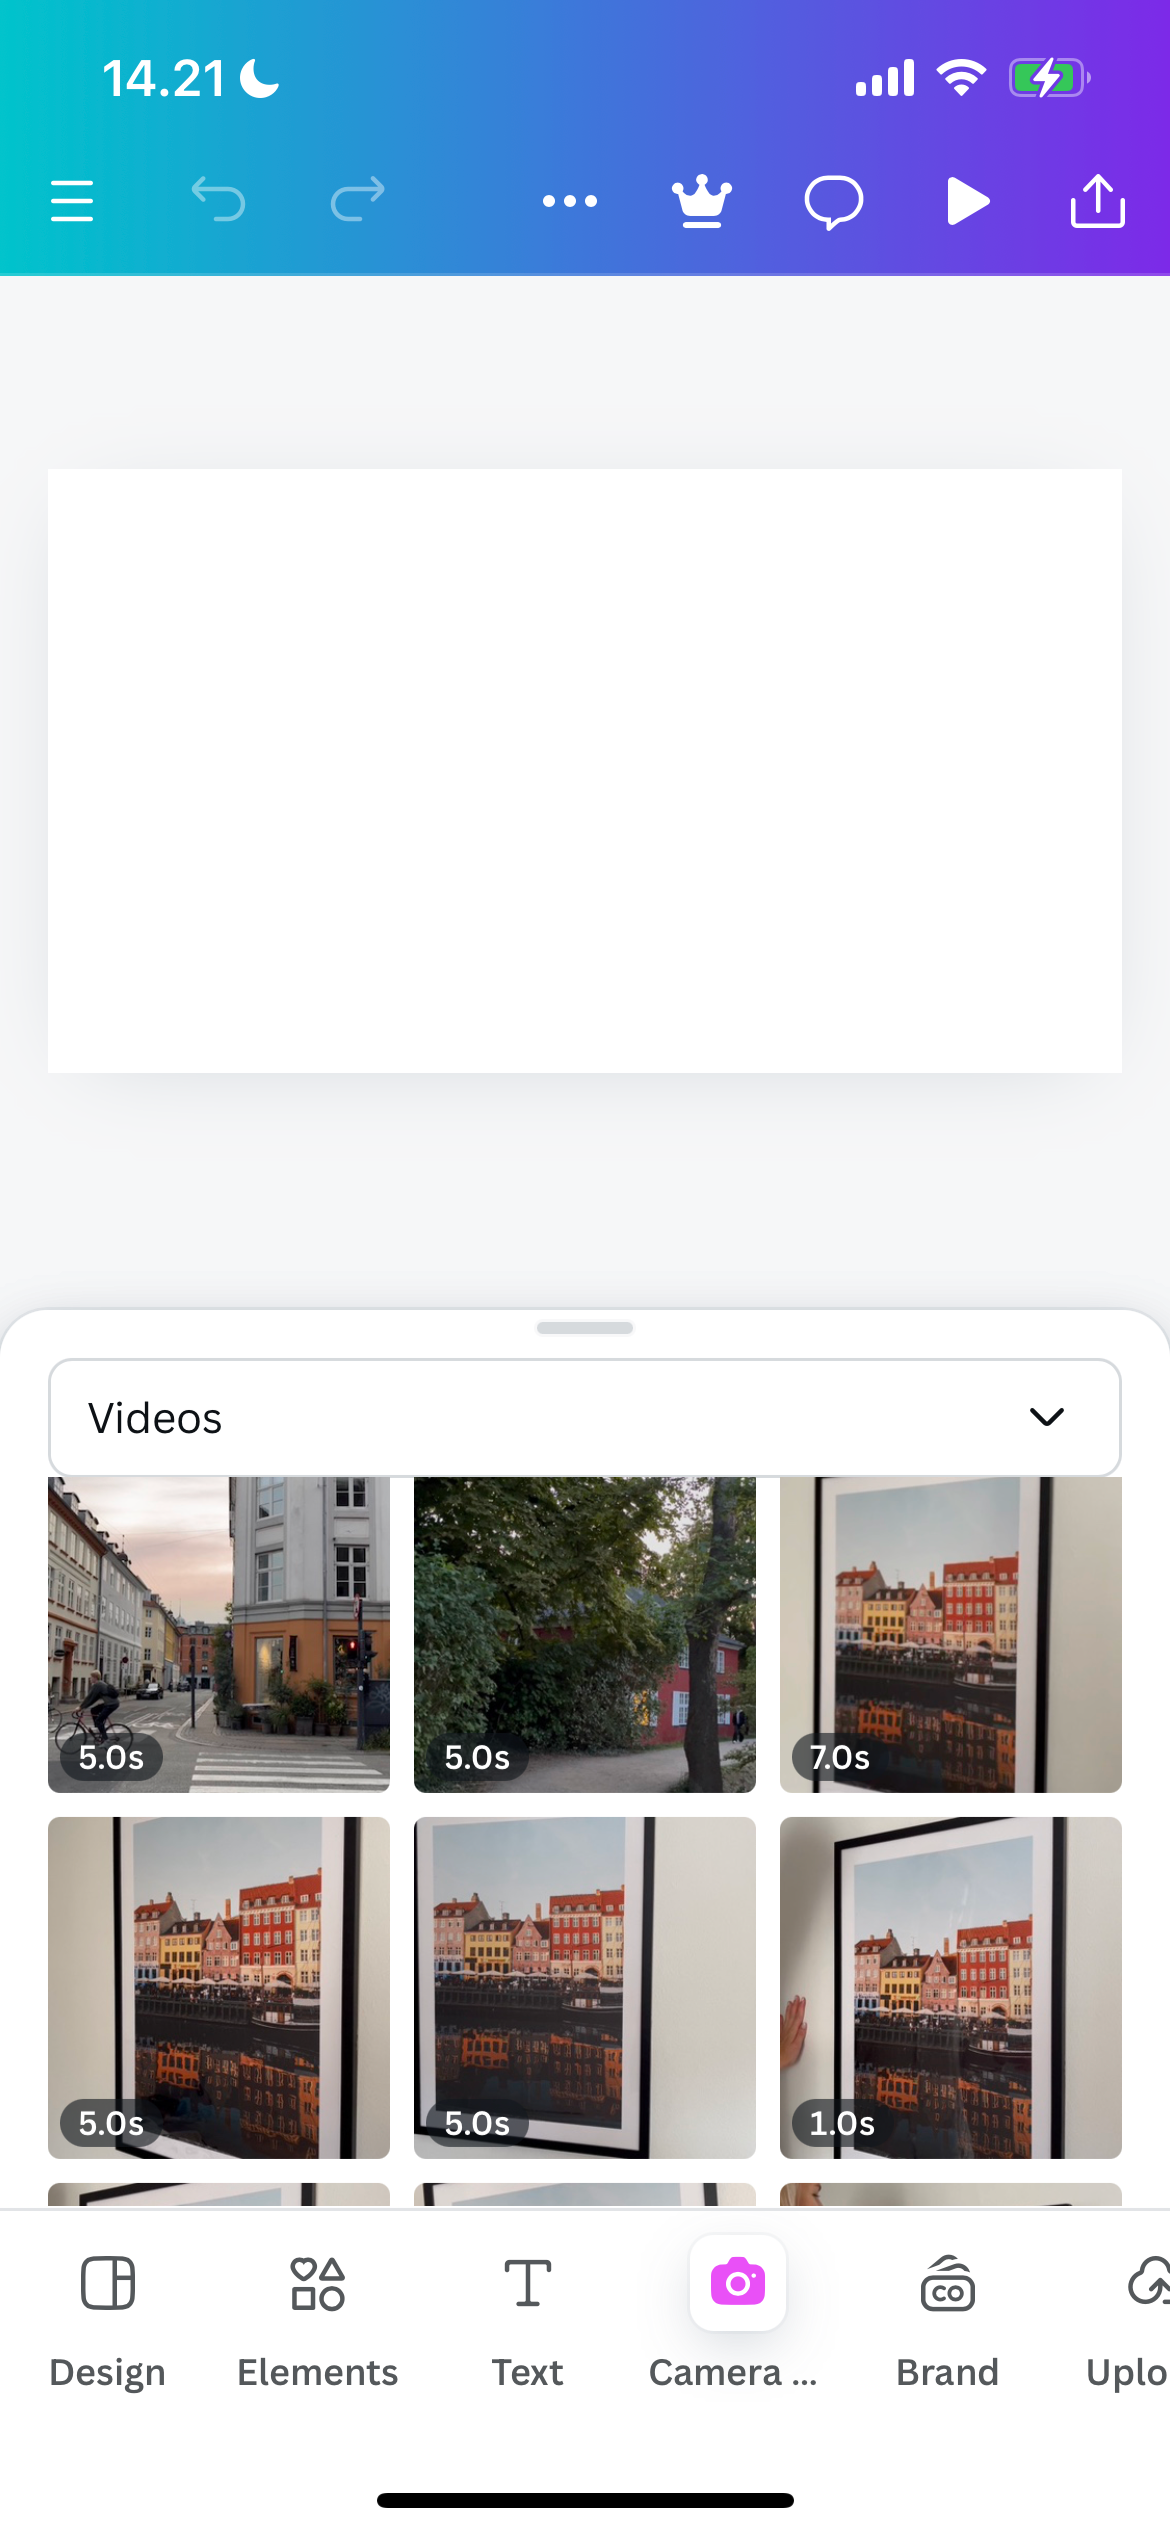
- Select the Camera tab.
- Expand the dropdown menu and choose Videos to ensure that you’re only importing video content.
- Select Add as new pages after choosing all of the clips you want to import. Do not select Add to page unless you want them all to appear on the same page.

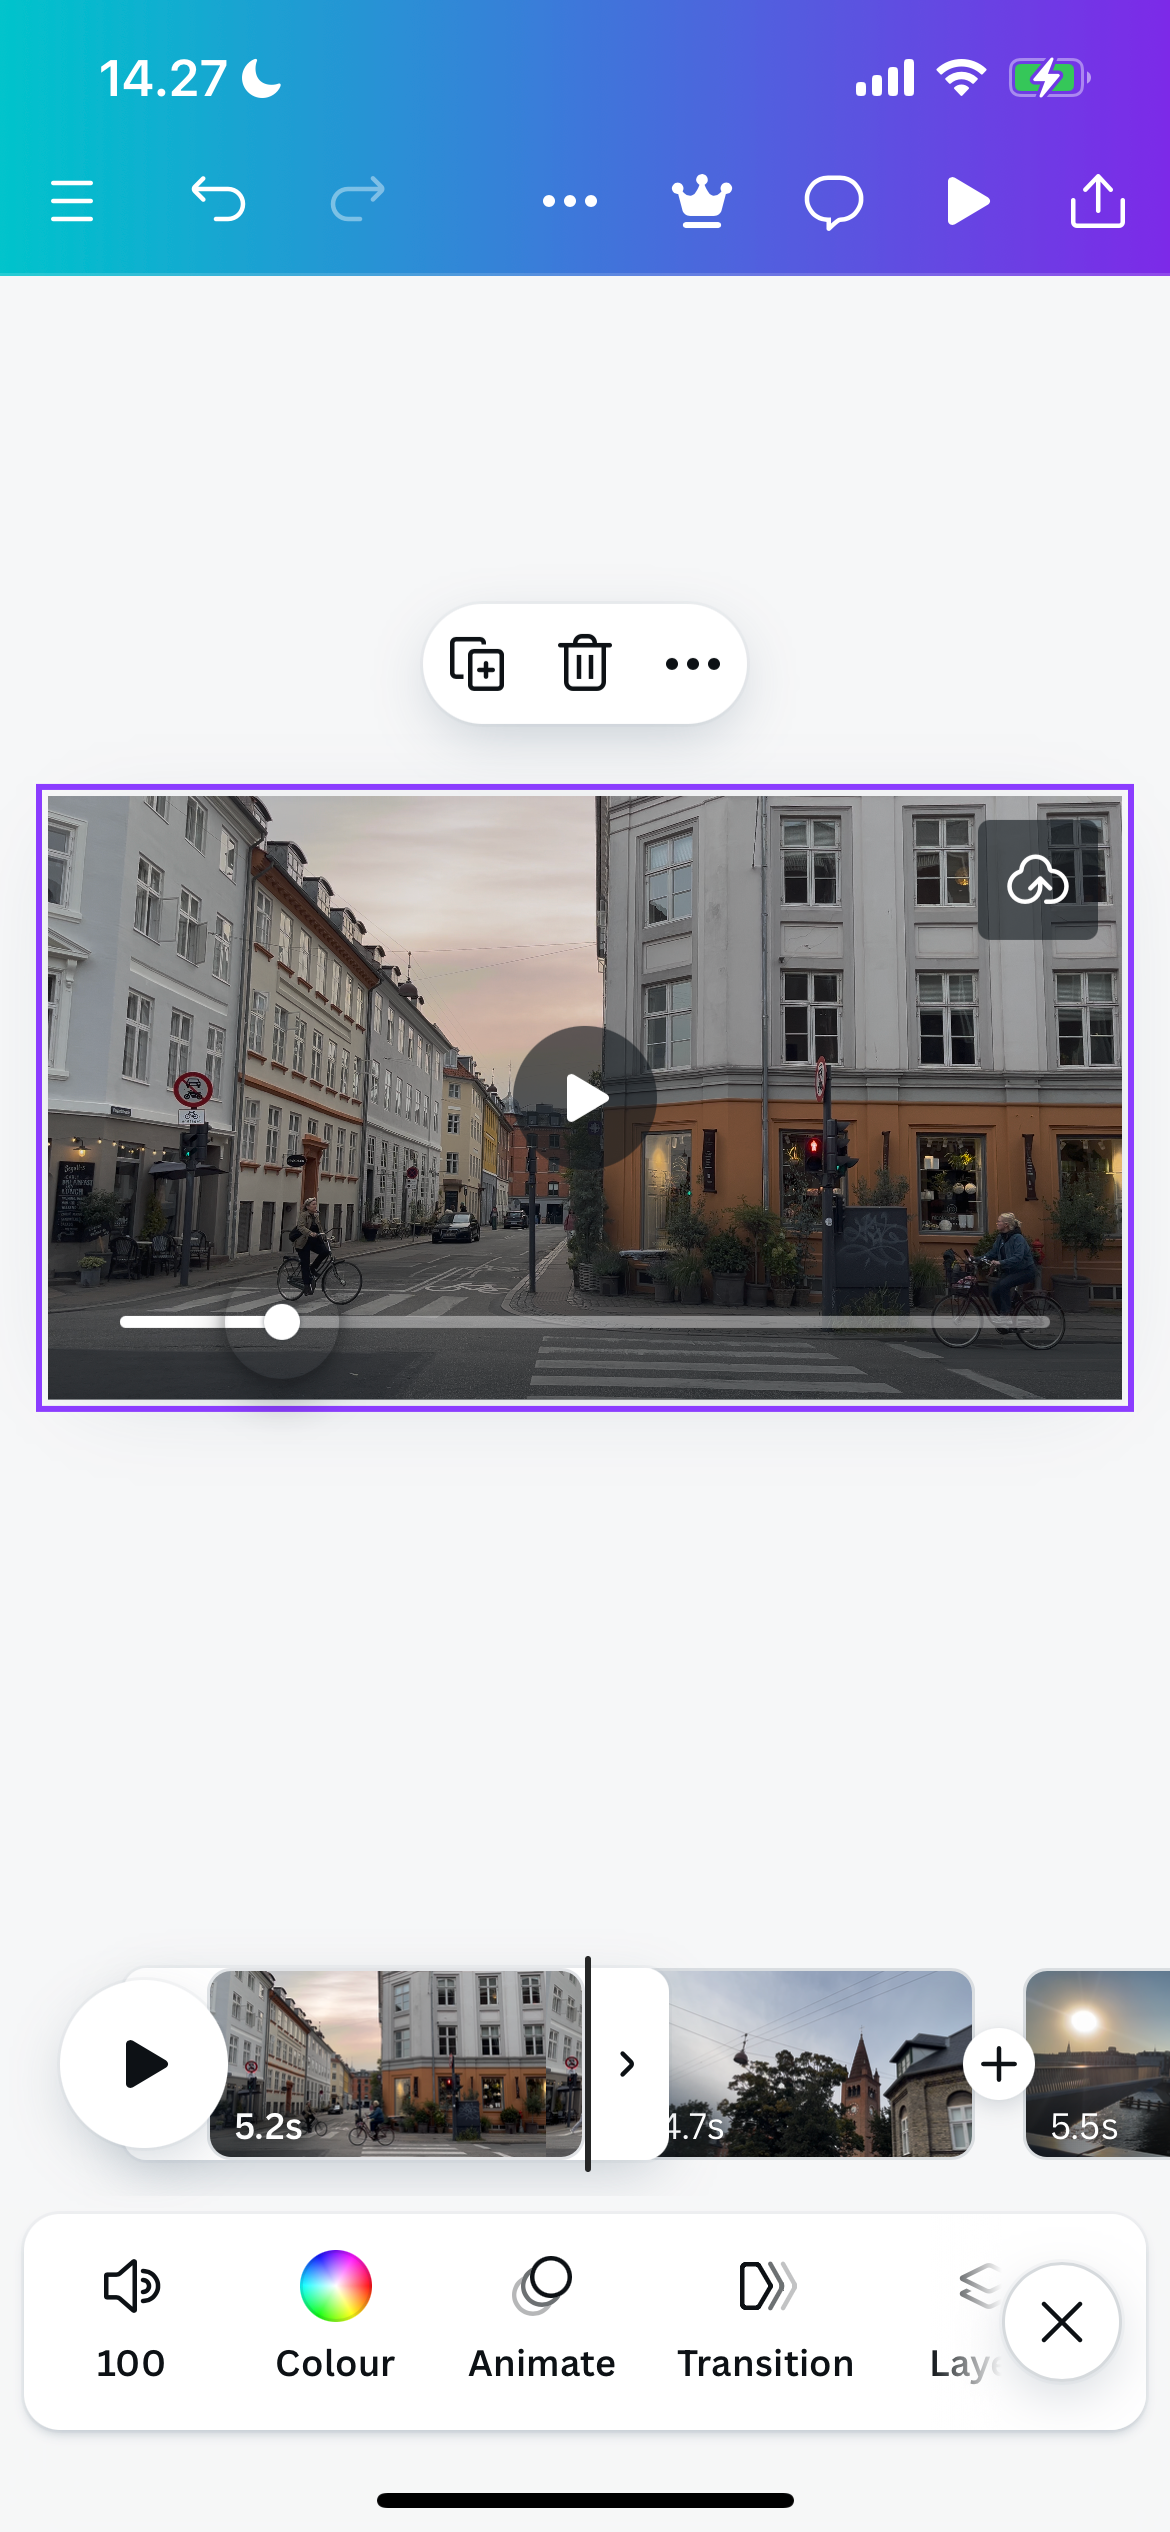
After importing your video clips, you’ll see an edit timeline at the bottom. You can use Canva to edit video content, but it’s also possible to create a video from pictures.
3Editing the Video Colors and Content
The bulk of my time editing in Canva is spent on video colors and other parts of the content. Since this is normally quite complex, I’m going to split this into two sections; first, I’ll look at editing the colors before moving on to the rest of the content.
Editing the Colors and Lighting in My Canva Video Clips
While Canva lacks the advanced color editing tools you’ll find elsewhere, it does have a helpful range of beginner-friendly tools. For example, you can add filters and adjust the saturation. Similarly, you can change different lighting aspects.
Here’s how to use these tools:
- At the bottom of the screen, select Adjust.
- Go into Filters and choose a filter if you’d like to do this. Otherwise, move on to the next step.
- Alter the tint and warmth in White balance before moving on to Light, Color, and Texture.
- Adjust each area to meet your tastes. Then, hit the x button to return to the main page.
- Repeat this process for all the clips in your video.
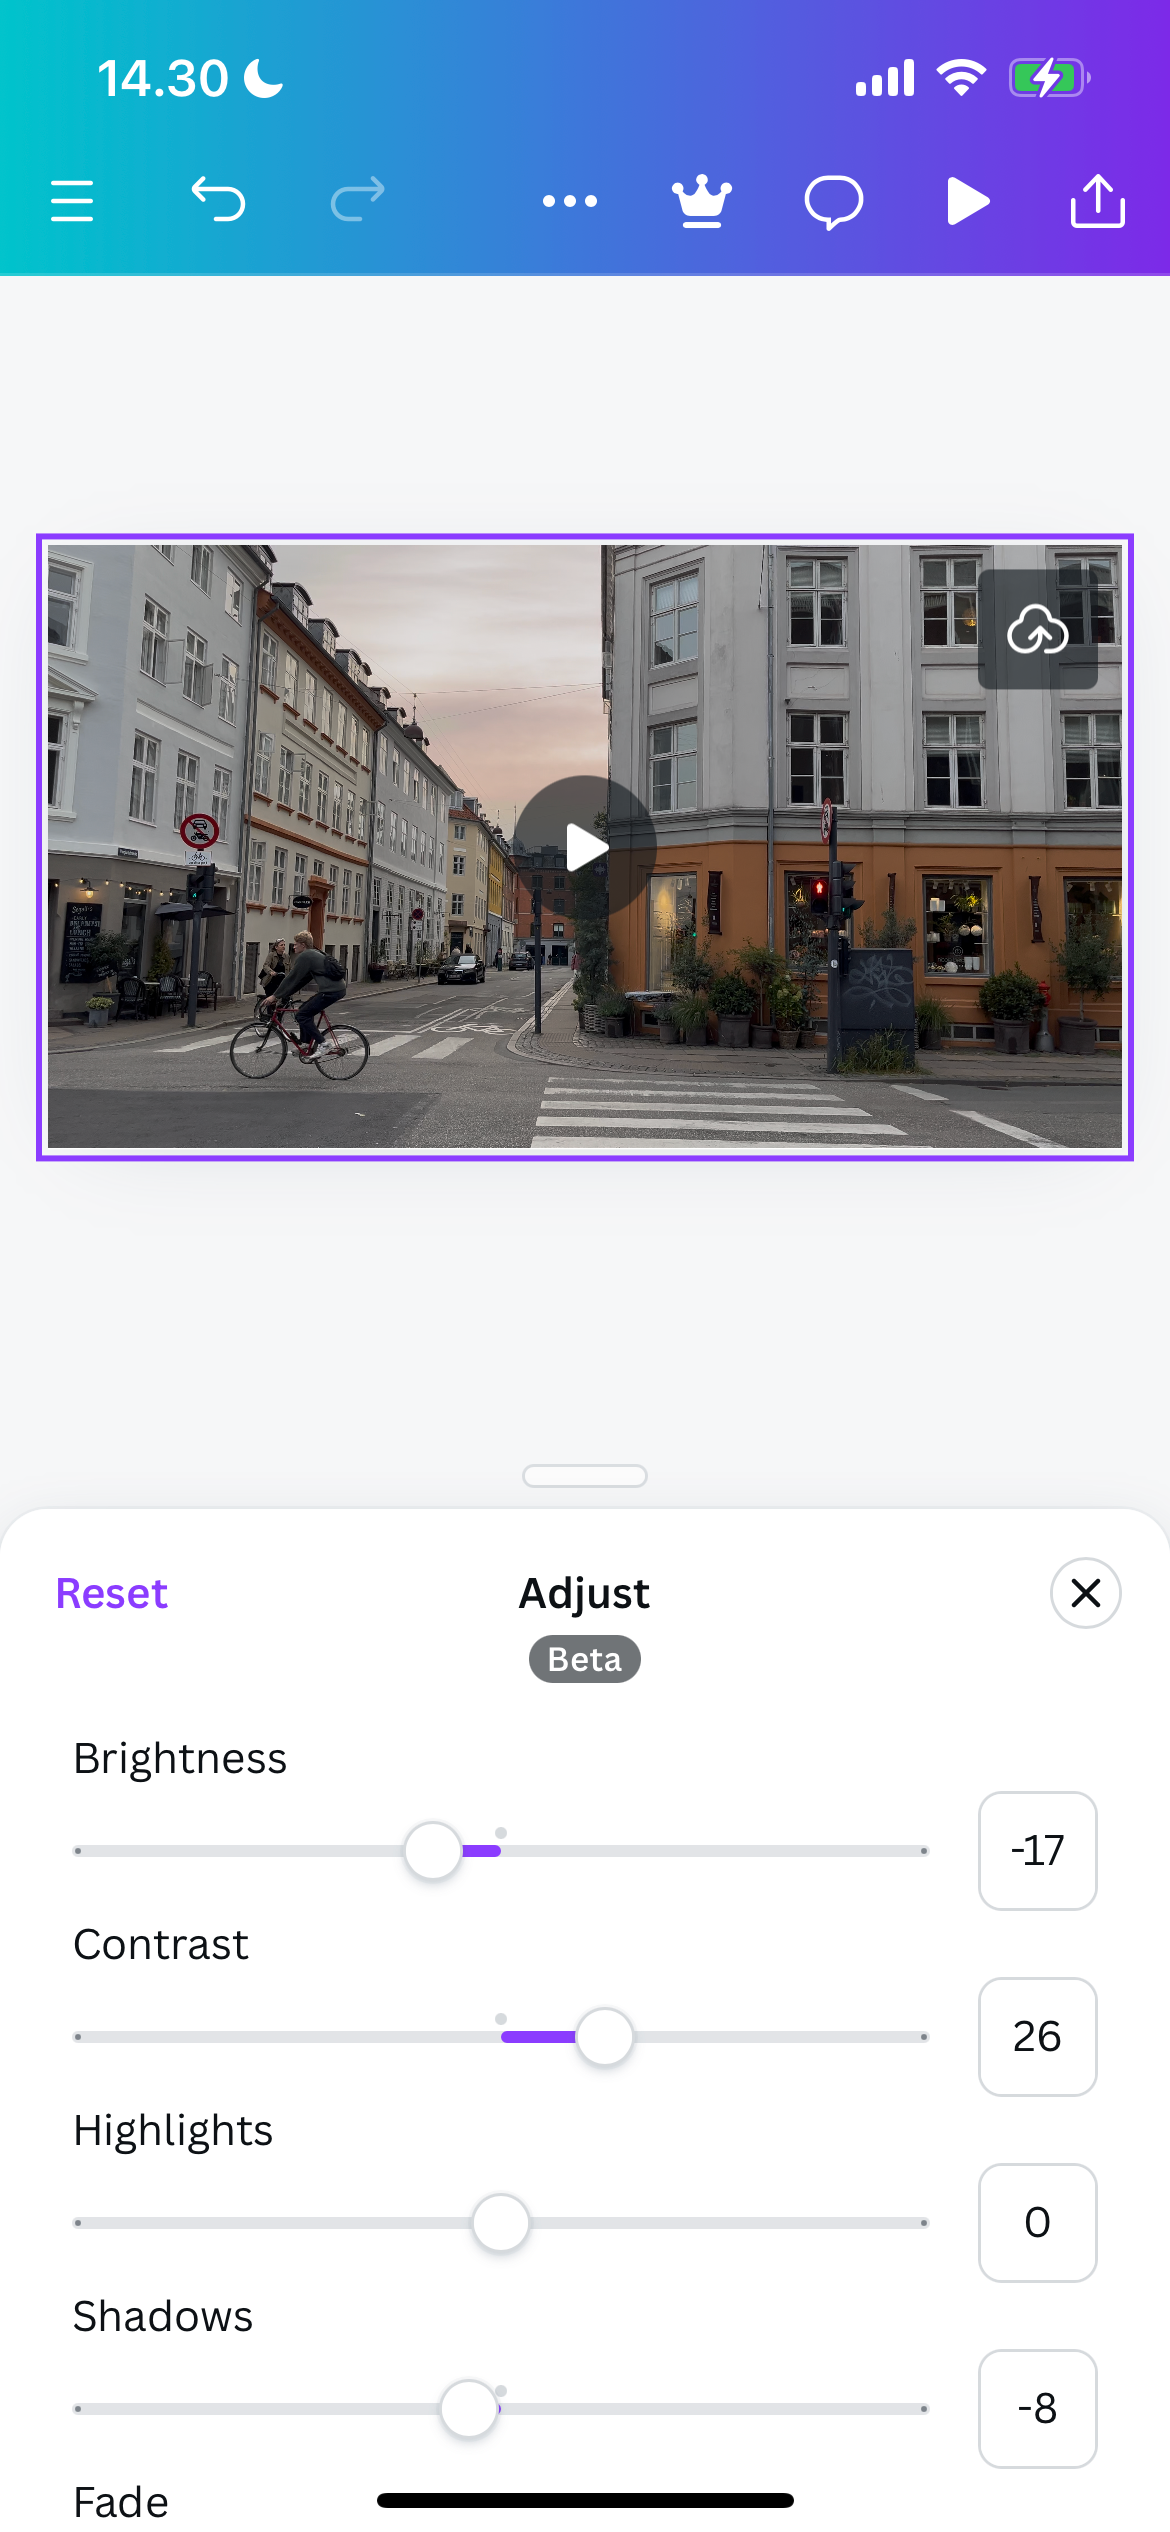
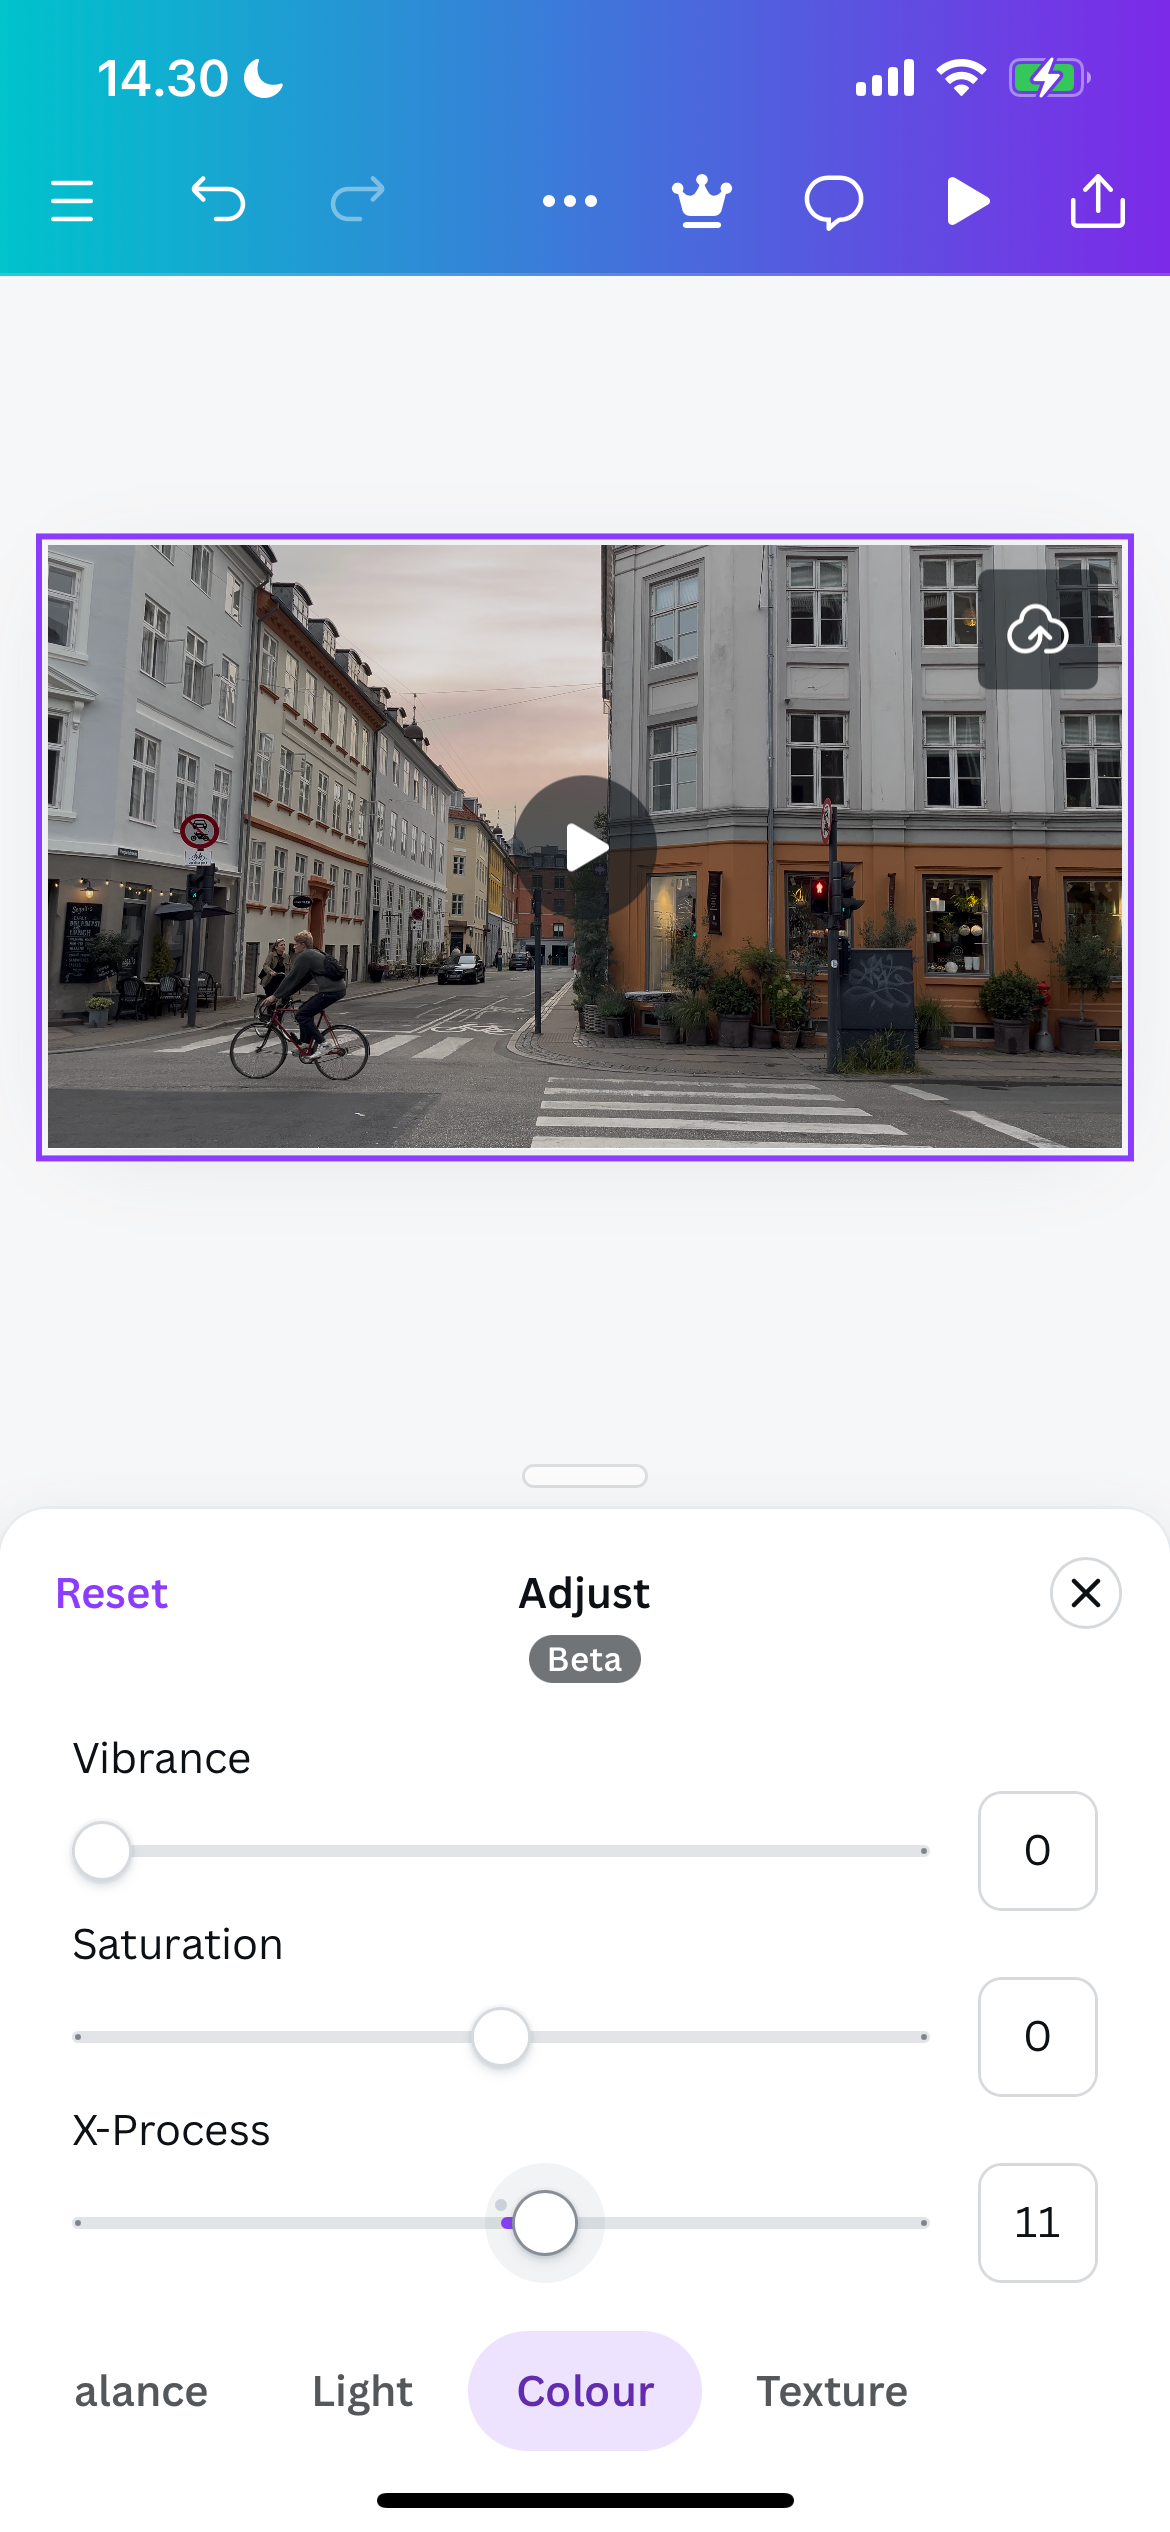
Besides using Canva to edit video colors, you can also change the color of images, graphic elements, and texts in Canva.
Adjusting Other Aspects of My Canva Video Content
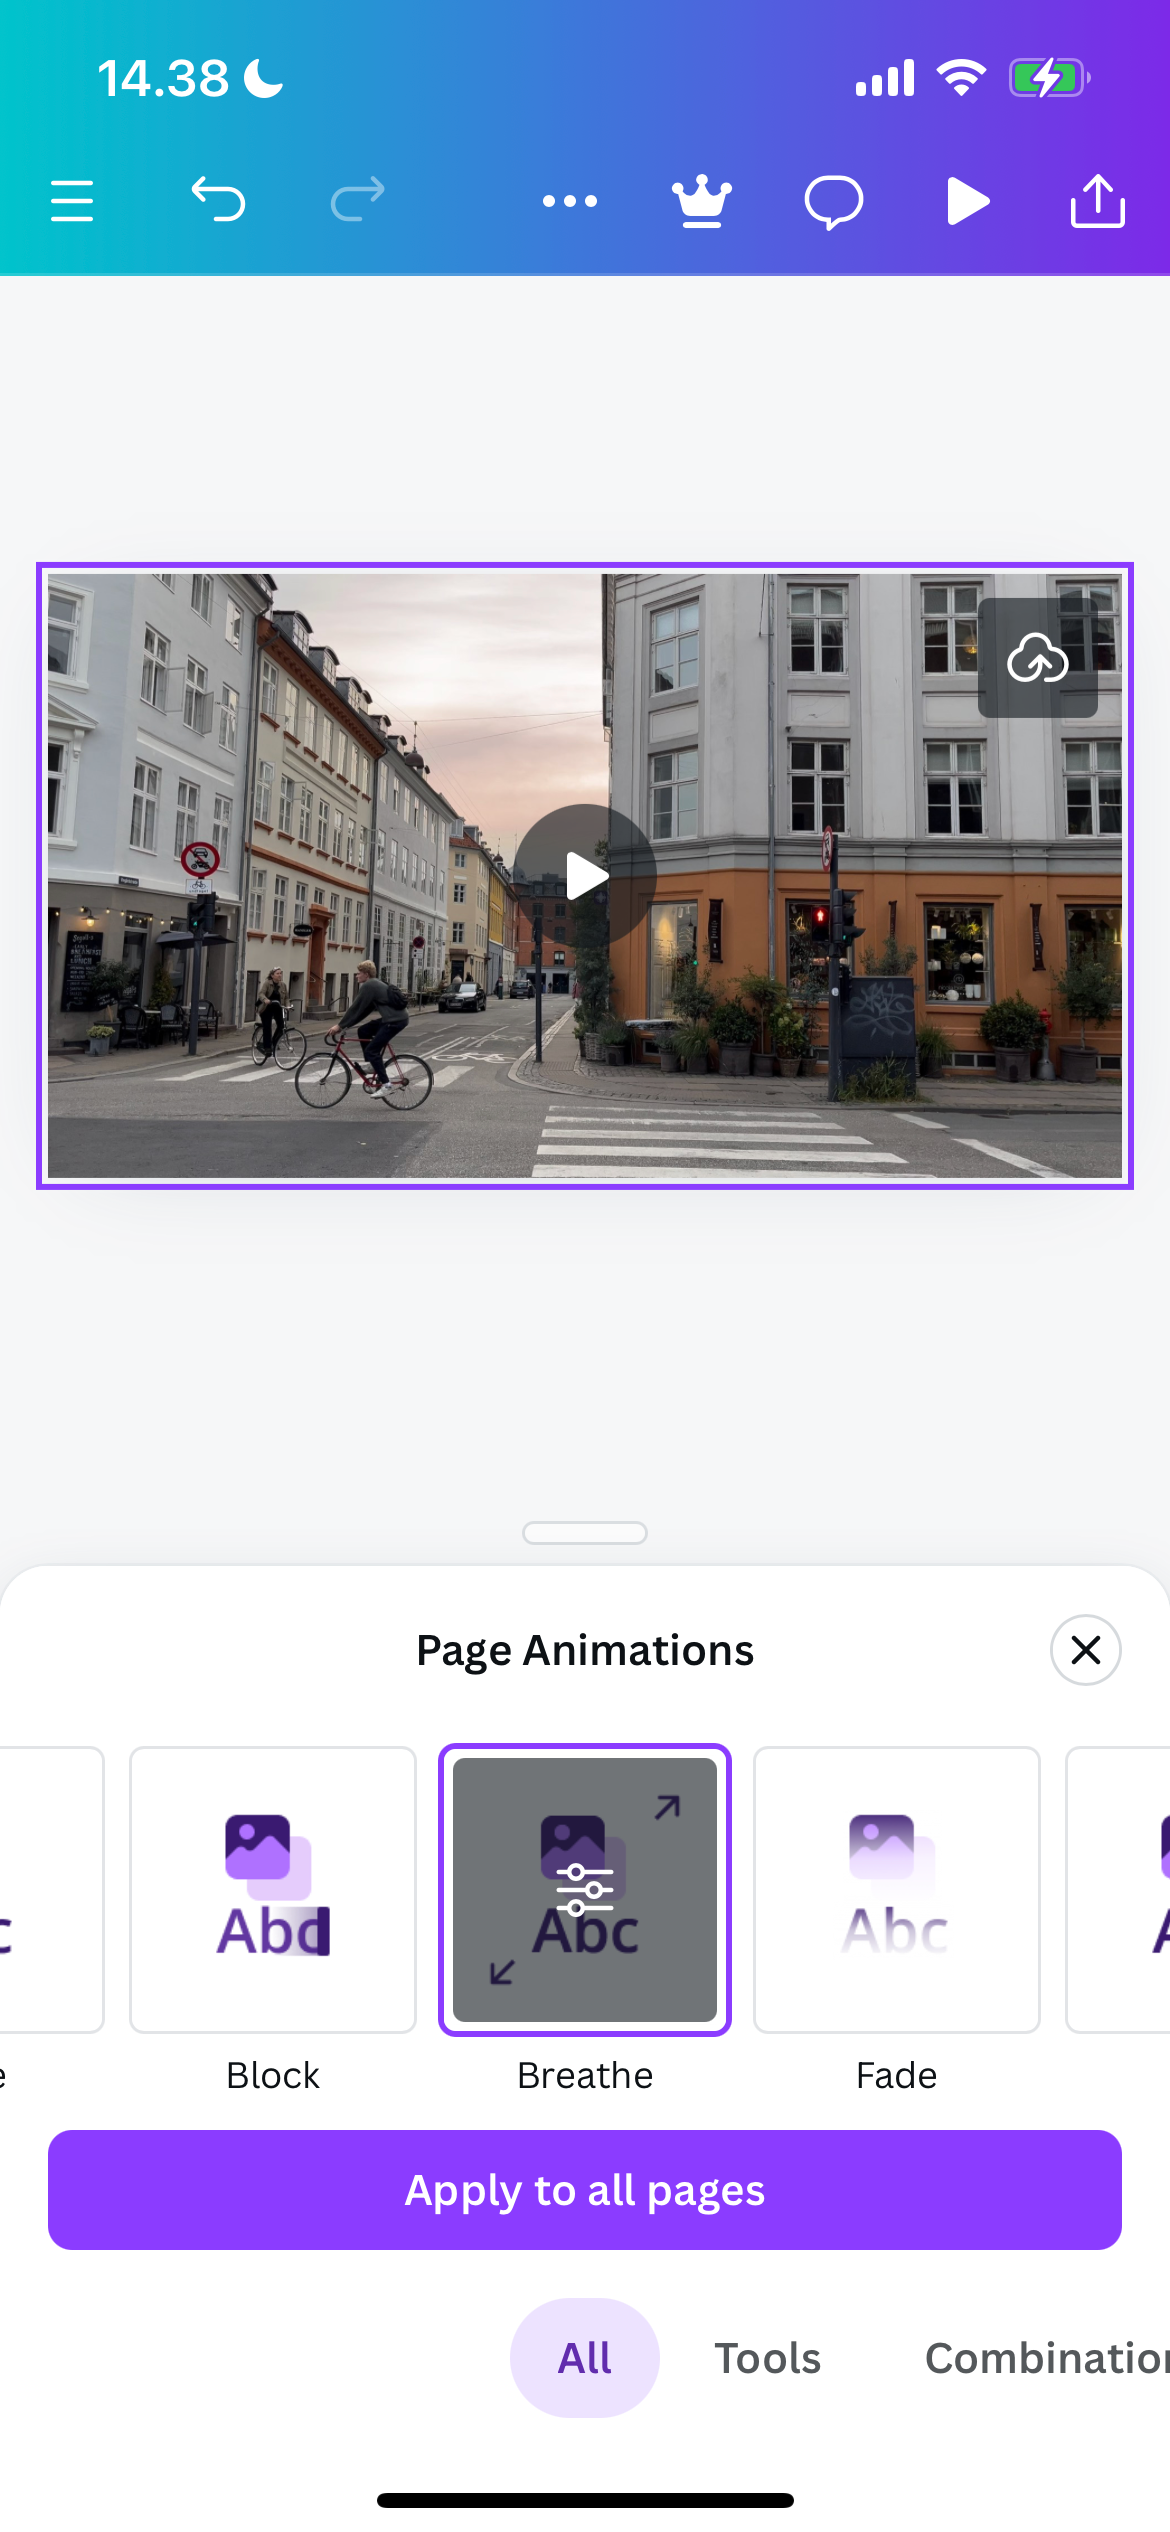
Once you’ve edited the colors, I recommend moving on to altering the content in your videos. For example, you can add transitions and animations. These include fades, zooms, and tumbles. In some cases, you might also benefit from using combinations.
You’ll see the different animation options broken into subsections, whereas transitions are all within the same row. It’s also possible to choose whether you want to apply these changes to all pages or just one, along with adjusting their intensity (you need Canva Pro to customize animations; a paid plan is not required for transitions).
I suggest making these changes in this order:
- Select Animate and choose the animation type you want in your videos.
- If you have Canva Pro, select the slider icon and change the scale.
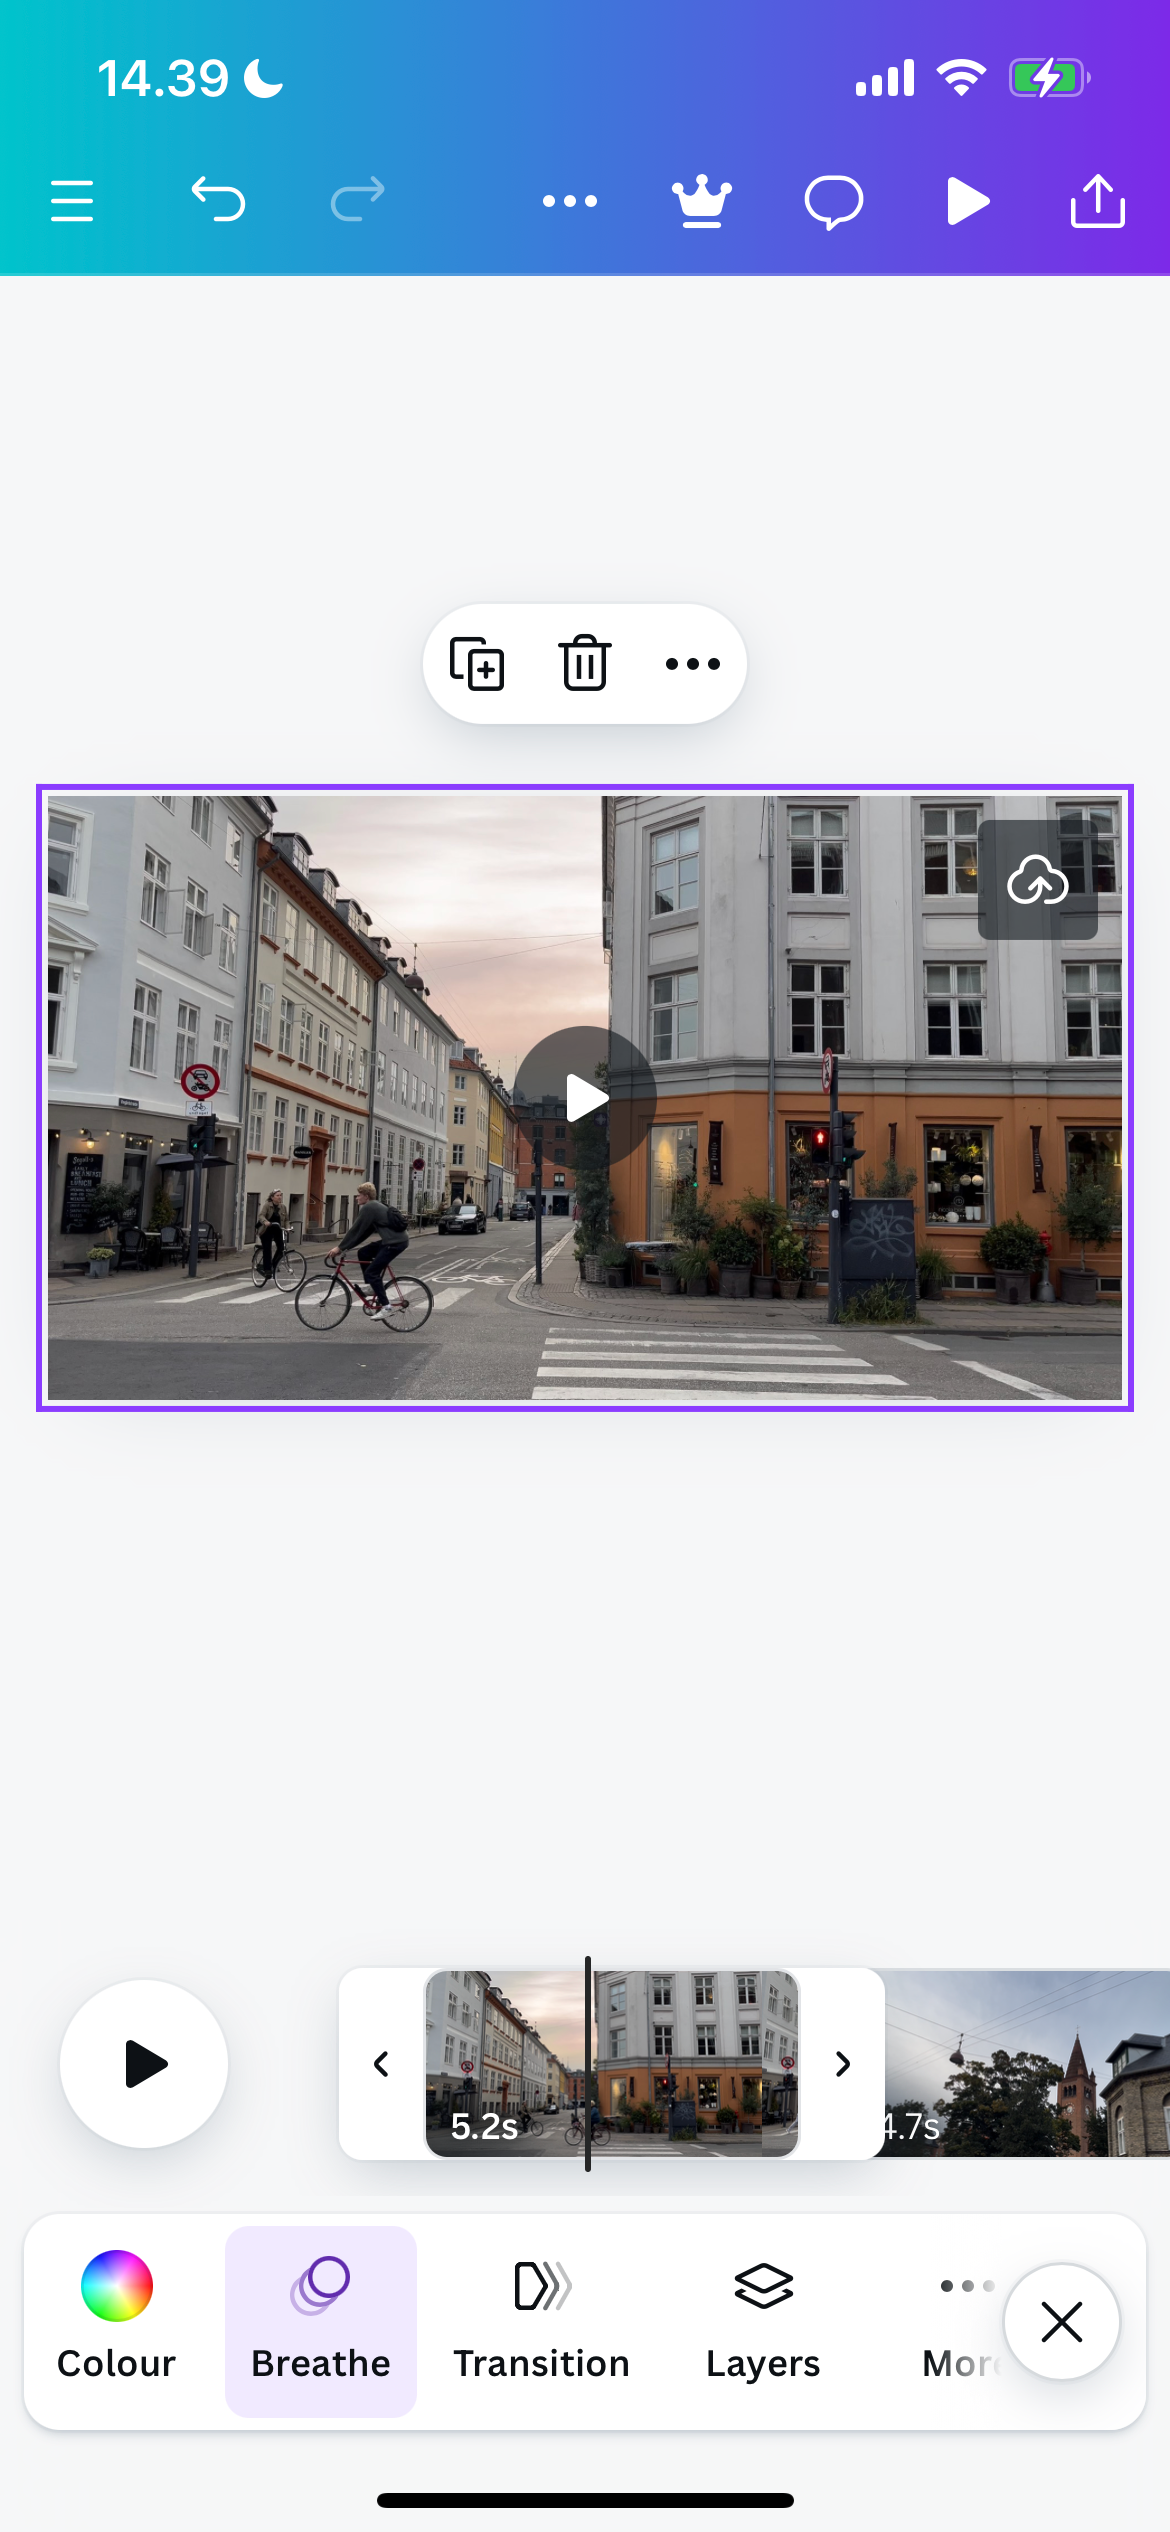
- Go back to the home page and tap Transitions.
- Choose the transition you want to add to your videos.
- Tap the transition again to reveal the slider. Unlike animations, you can change the intensity without a paid plan.
- Select the < button to return to the previous window. When there, tick Apply between all pages if that’s what you want to do before hitting the x button.
If you’re editing videos for YouTube, you might want to consider checking out ways that YouTubers can use Canva for graphics and branding.
4Adding the Finishing Touches
You’re almost ready to export your video project, but before doing that, I recommend adding a few extra touches. For example, Canva lets you change the video speed. You can also decide if you wish to play your content automatically or on repeat. Do this by selecting Playback and adjusting these categories as you feel is necessary.
It’s also possible to alter your clip lengths by dragging either edge inward/outward. And if you want to remove any of your clips, simply tap it and select the trash icon.
5Altering the Sound
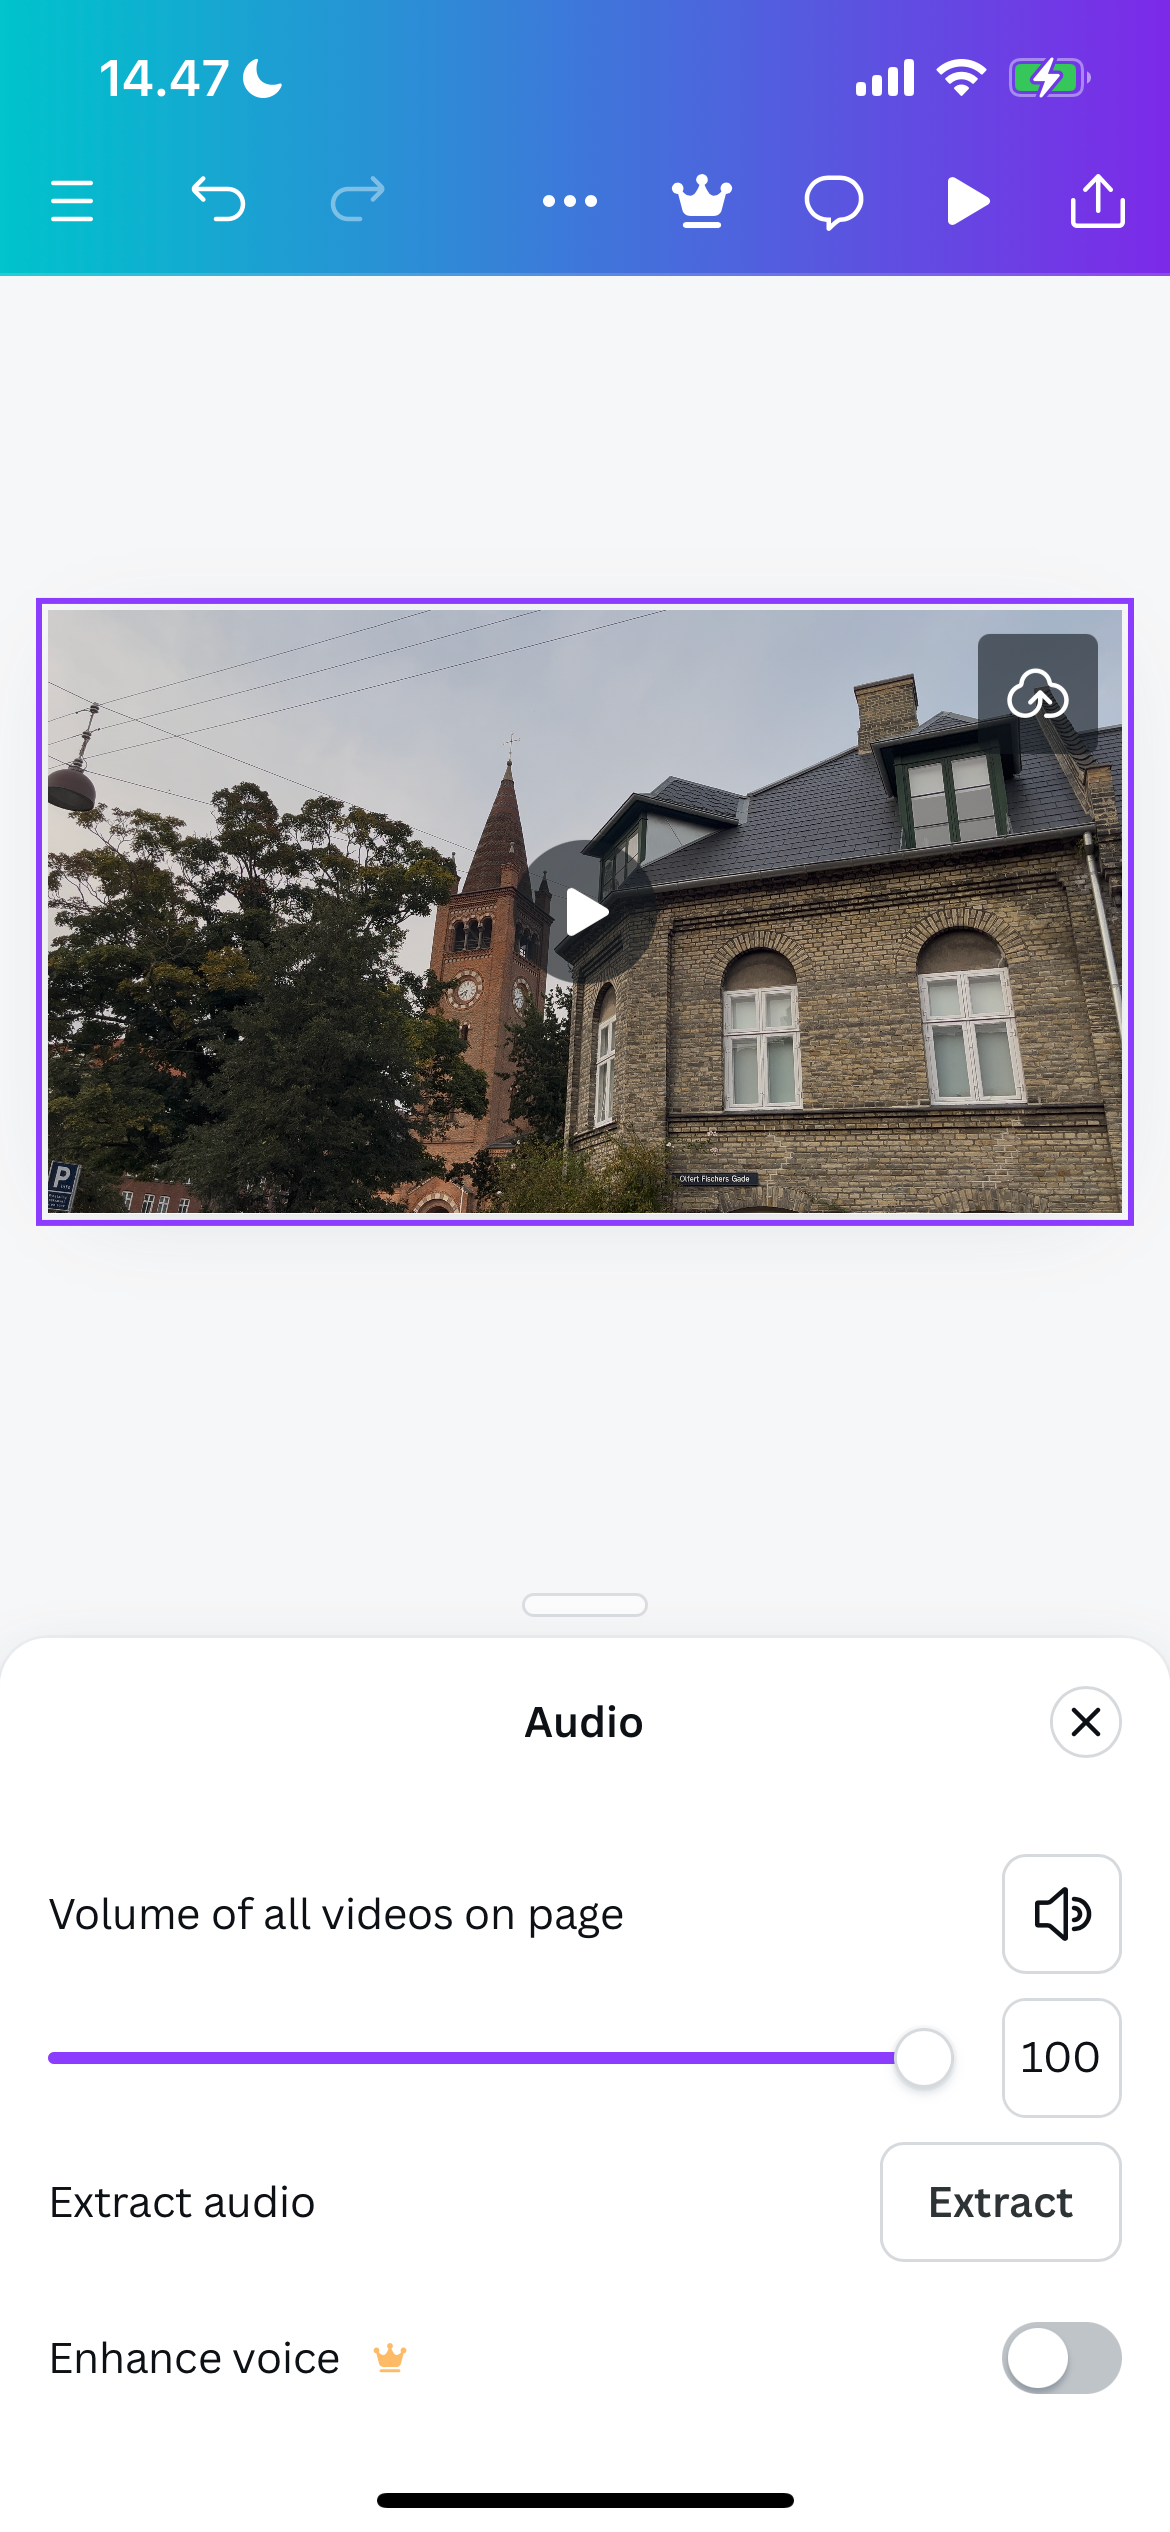
Before exporting your project, I suggest altering the sound in your Canva projects. To be honest, I don’t normally do much here beyond changing the volume. You can use the slider to reduce it or tap the icon to mute all of them.
To add music to your content, I don’t recommend using Canva. Instead, I suggest using one of the other ways to add music to your videos on iPhone and Android.
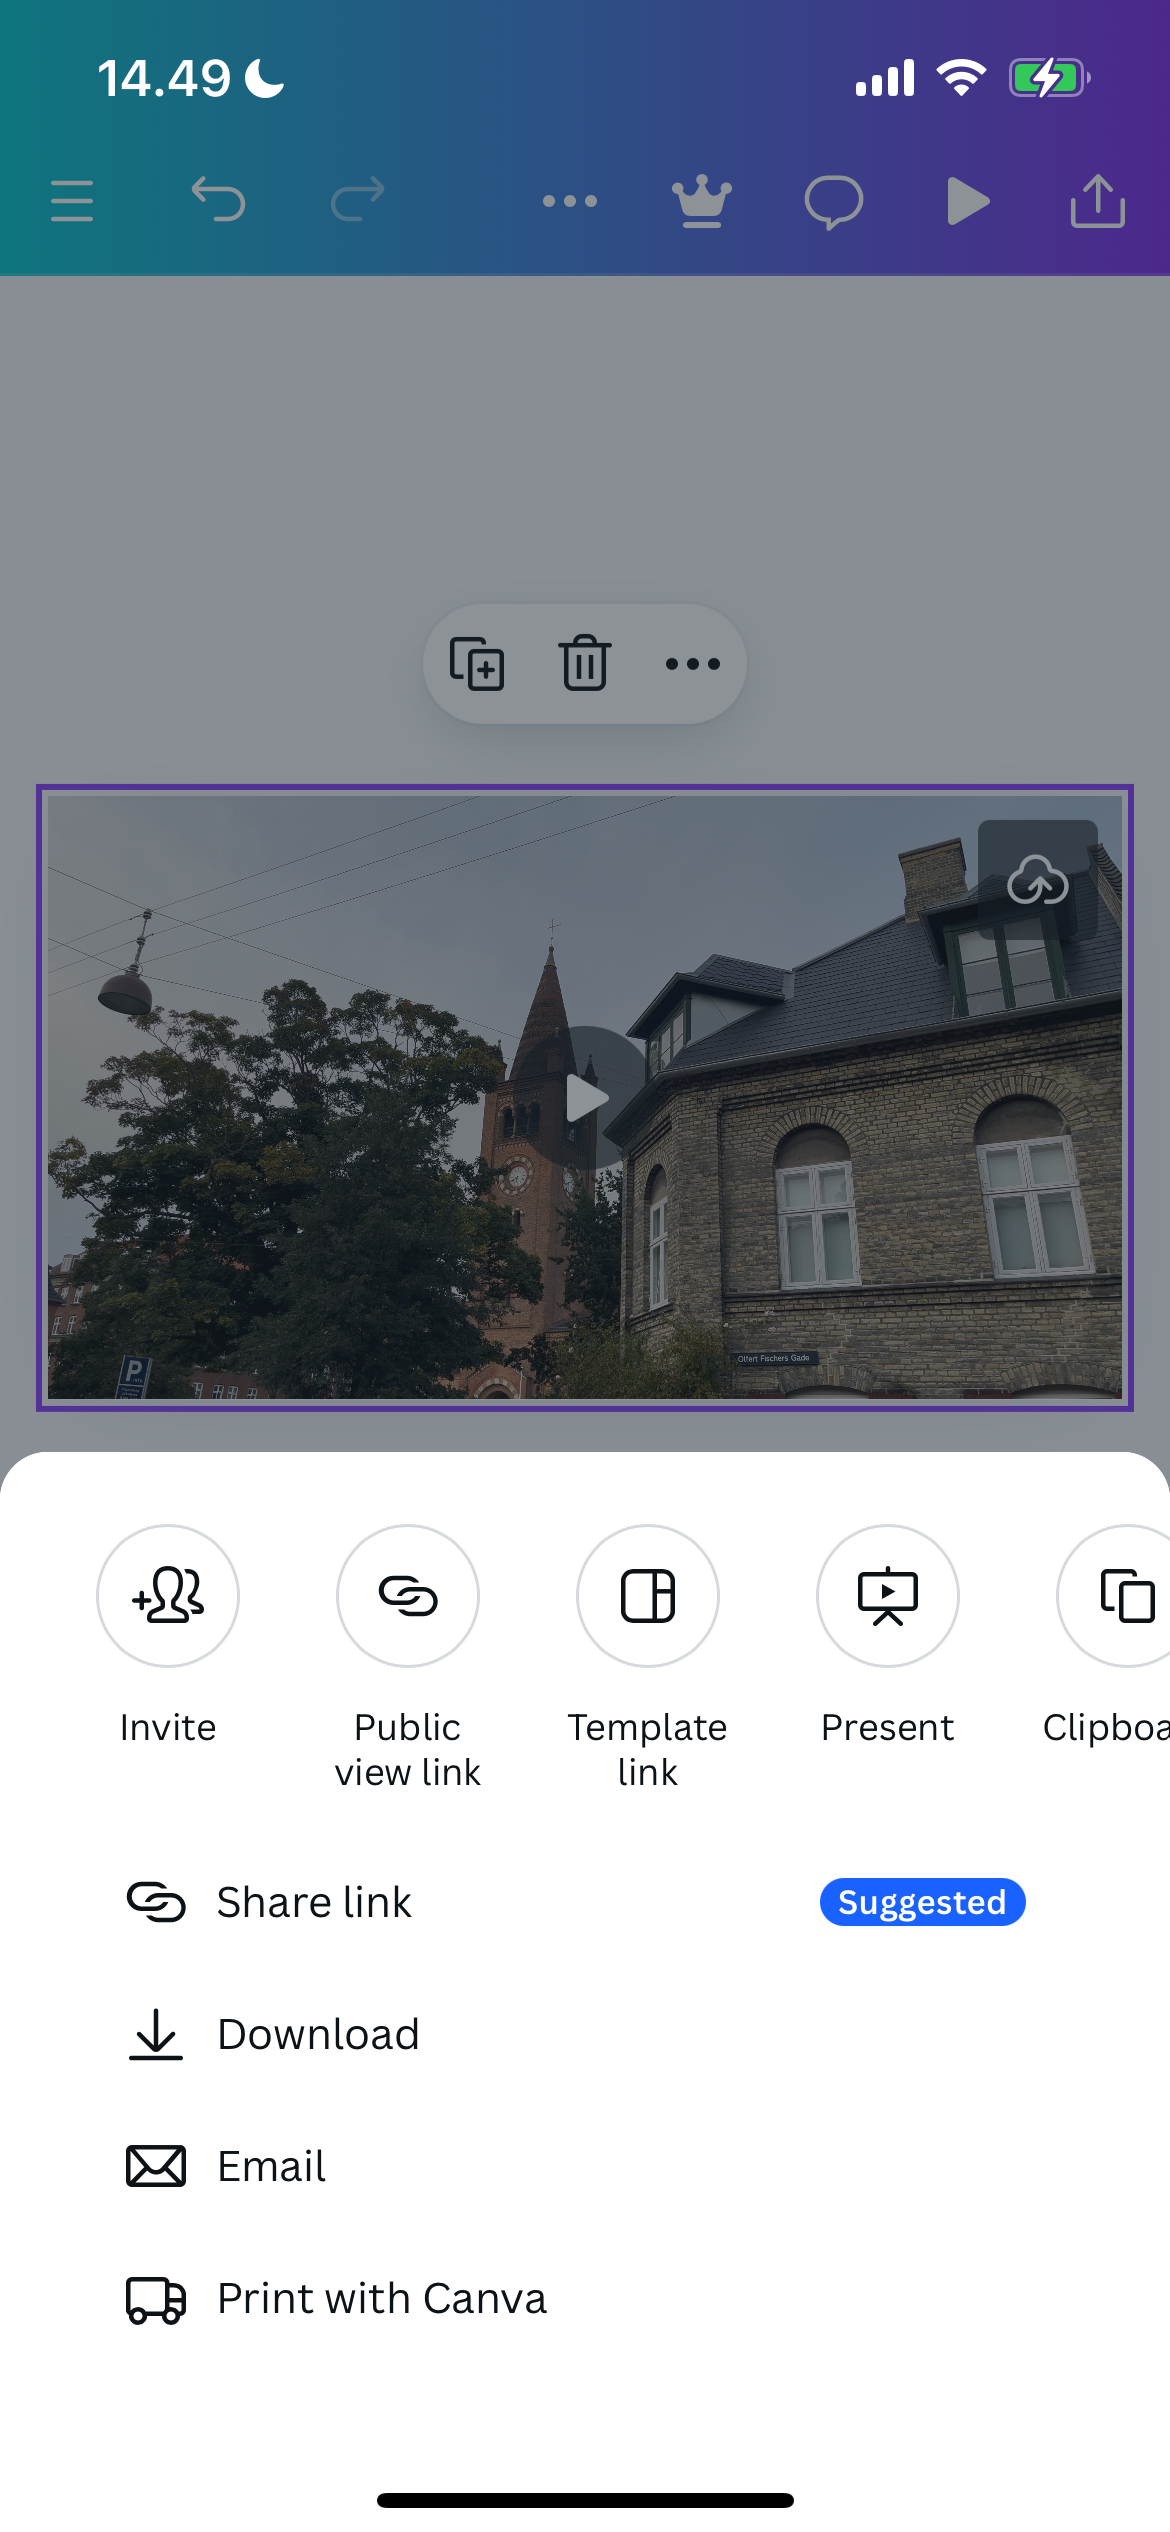
Once you’re ready to export your video, select the download icon in the top right-hand corner and tap Download.
Editing videos in Canva is incredibly straightforward, and you can make multiple simple changes like tweaking the colors and adding filters. Even though it’s not the best place to add music, you can easily do that elsewhere. You can use Canva to edit Reels, YouTube videos, TikTok posts, and more.
