Excel is incredibly powerful when your data is complete, but what happens when you need to solve for unknown variables? Enter Goal Seek and the Solver add-in, two tools that let Excel do the heavy lifting when it comes to finding those unknowns.
What Does Excel’s Goal Seek Do?
When you have a formula in Excel but need to find the value of one variable that will give you a specific result, Goal Seek is your go-to tool. It lets you adjust a single variable to meet a desired outcome, making it ideal for quick problem-solving scenarios.
Goal Seek is useful in numerous scenarios: hitting sales targets, calculating loan payments, adjusting production levels, you name it. Goal Seek helps you find the unknown value for any financial analysis.
How to Use Goal Seek in Excel
Goal Seek is already built into Excel. It’s under the Data tab, in the What-If Analysis menu. Let’s walk through it with a simple example.
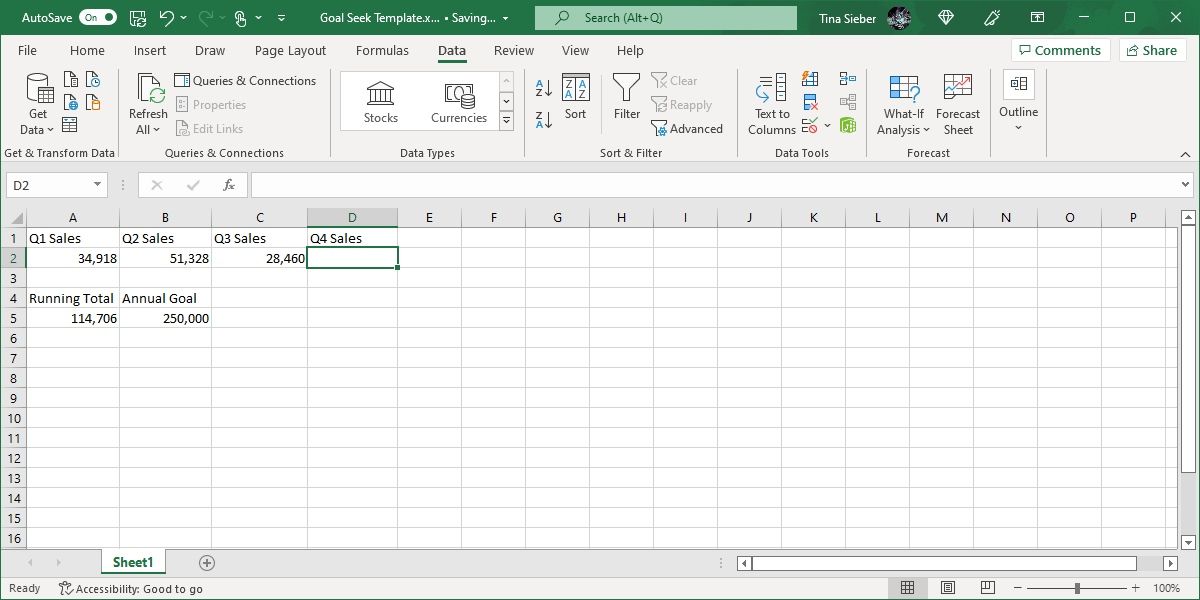
For this example, we’ll be using a very simple set of numbers. We have three quarters’ worth of sales numbers and a yearly goal. We can use Goal Seek to figure out what the numbers need to be in Q4 to make the goal.
As you can see, the current sales total is 114,706 units. If we want to sell 250,000 by the end of the year, how many do we need to sell in Q4? Excel’s Goal Seek will tell us.
Here’s how to use Goal Seek, step by step:
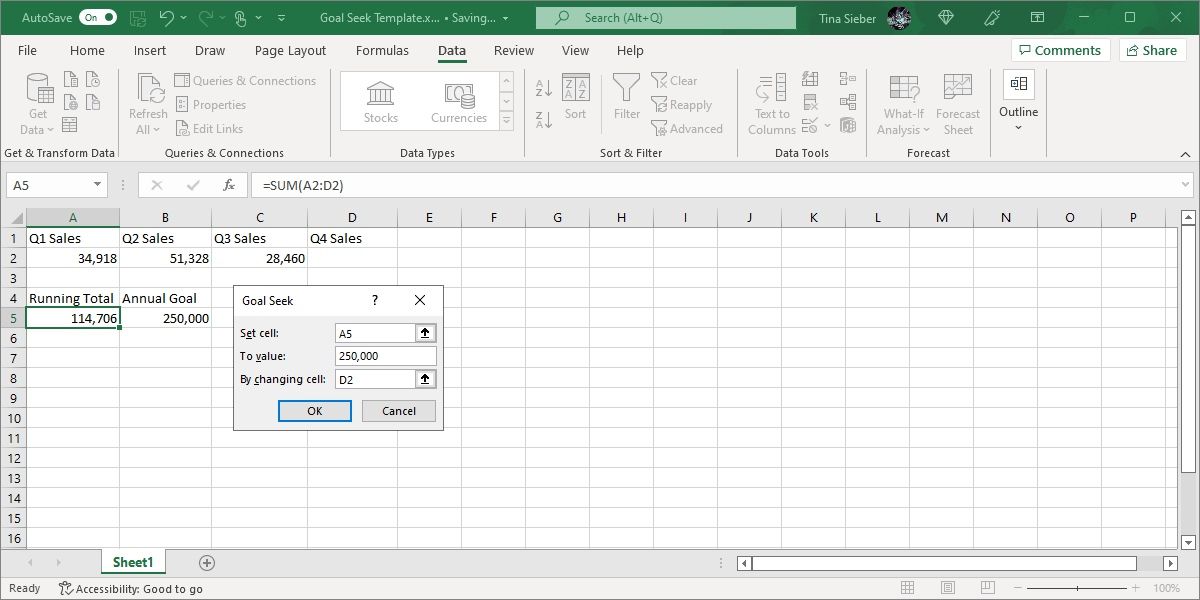
- Go to Data > What-If Analysis > Goal Seek.
- In the Set Cell field, select the cell that contains your total sales (e.g., A5).
- In the To Value field, enter your target value, which in this case is 250,000.
- In the By Changing Cell field, select the cell where your Q4 sales value will go (e.g., D2).
- Click OK.
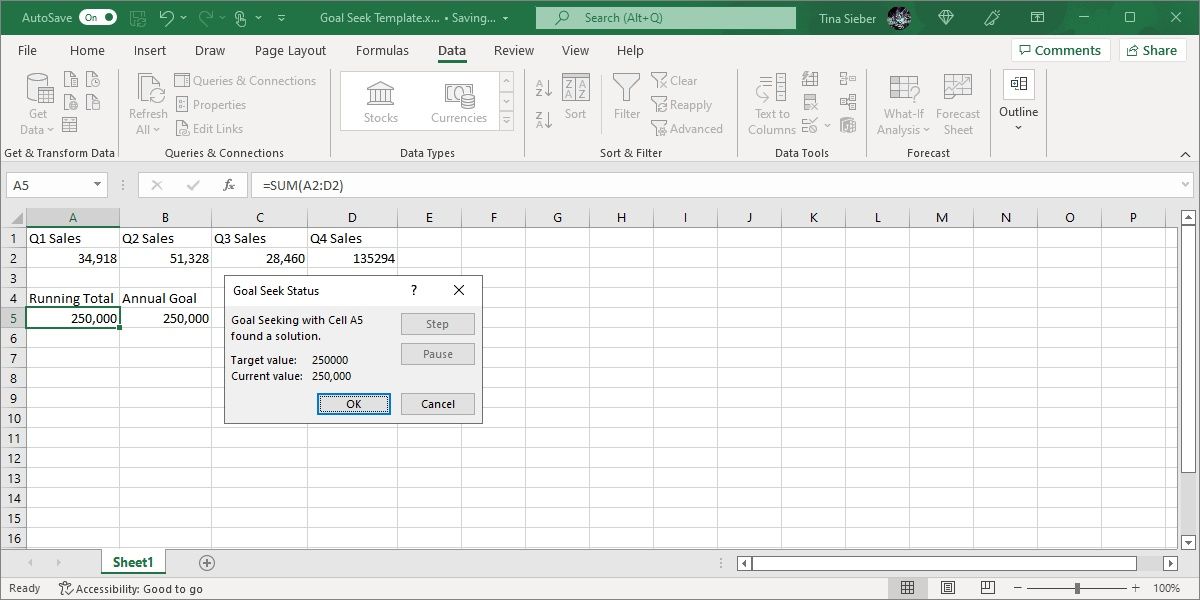
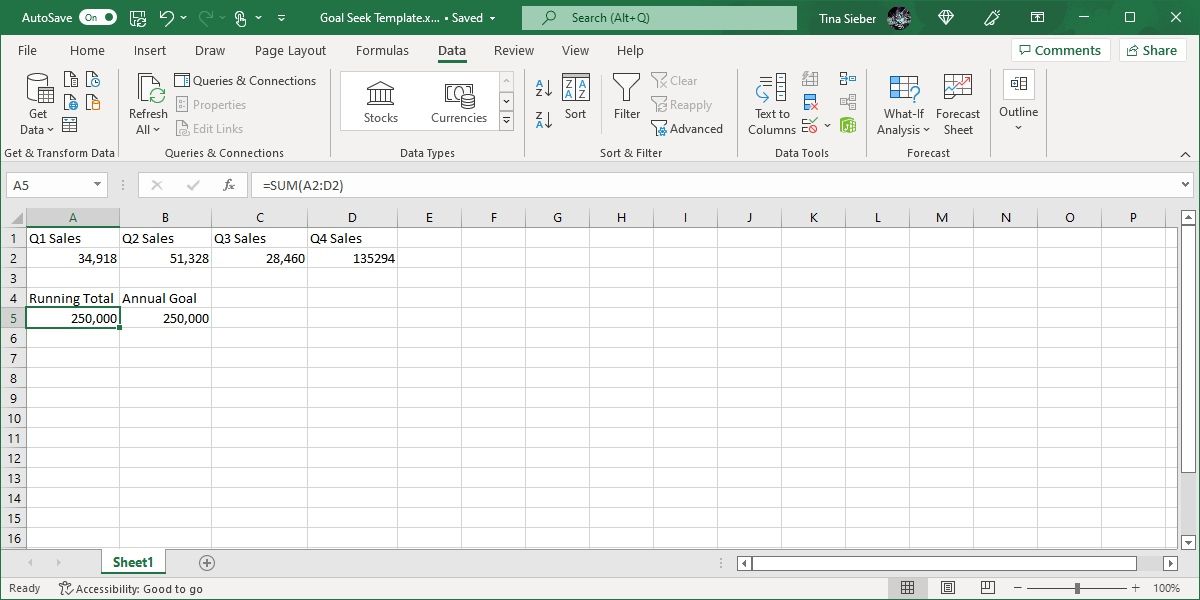
You’ll see the value that solves your equation in the cell that you chose for By changing cell. In our case, the solution is 135,294 units. Of course, we could have just found that by subtracting the running total from the annual goal. But Goal Seek can also be used in a cell that already has data in it. And that’s more useful.
Excel overwrites previous data when using Goal Seek. It’s a good idea to run Goal Seek on a copy of your data. It’s also a good idea to make a note on your copied data that it was generated using Goal Seek. You don’t want to confuse it with current, accurate data.
So Goal Seek is one of the most useful Excel functions, but it’s not all that impressive. You can only use it on a single cell at a time. If you want to use Excel’s Goal Seek on multiple cells simultaneously, you’ll need a much more powerful tool. Fortunately, one such tool comes with Excel. Let’s have a look at the Solver add-in.
What Does Excel’s Solver Do?
In short, Solver is like Goal Seek on steroids. If you were wondering how to use Goal Seek in Excel for multiple cells at once, this is it. It takes one goal variable and adjusts a number of other variables until it gets the answer you want.
It can solve for a maximum value of a number, a minimum value of a number, or an exact number. And it works within constraints, so if one variable can’t be changed, or can only vary within a specified range, Solver will take that into account.
Excel doesn’t have Solver by default. It’s an add-in, so you have to load it first. Fortunately, it’s already on your computer.
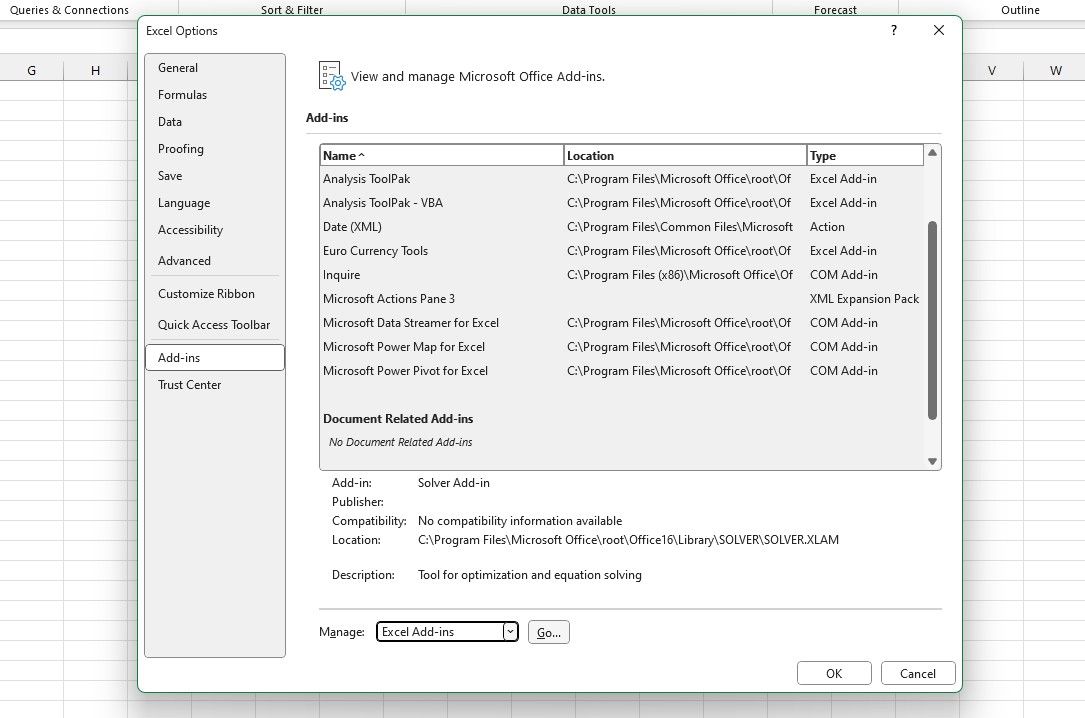
- Go to File > Options > Add-Ins.
- In the Manage box, select Excel Add-ins and click Go.
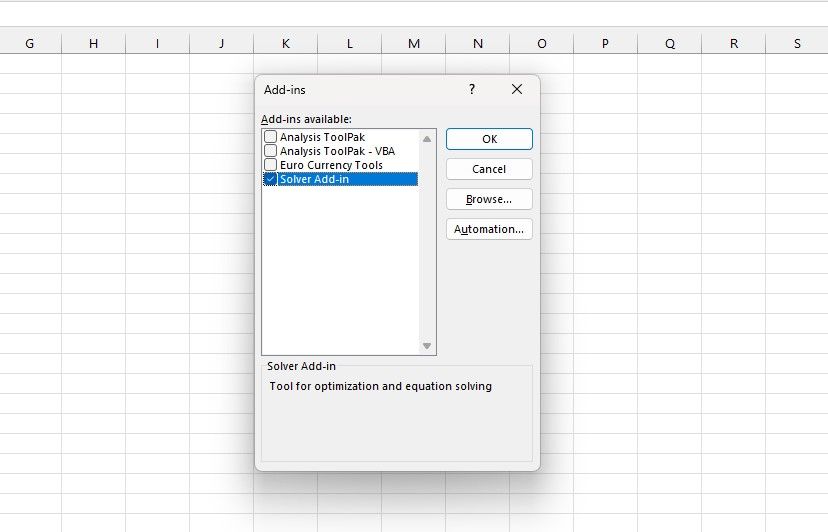
- In the window that pops up, check Solver Add-In and click OK.
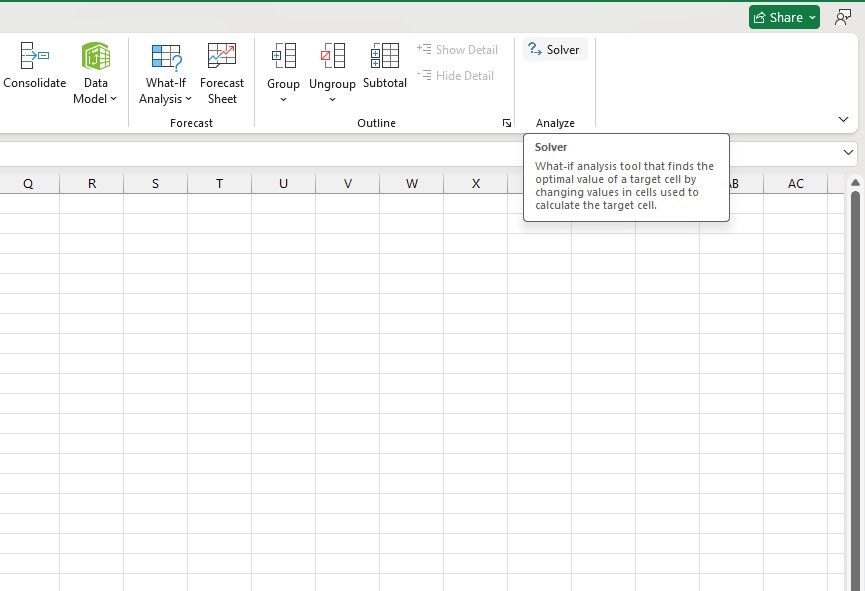
You’ll now see the Solver button in the Analysis group of the Data tab:
How to Use Solver in Excel
There are three parts to any Solver action: the objective, the variable cells, and the constraints. The table below explains these parameters:
| Objective | The goal you’re aiming to achieve. The objective is set in a single cell that calculates the final result of interest. |
| Variable Cells | The cells Solver can adjust to reach the objective. They represent the unknown values in your equation. |
| Constraints | Rules that limit how much your variable cells can change. You can set these using logical operators in Excel. |
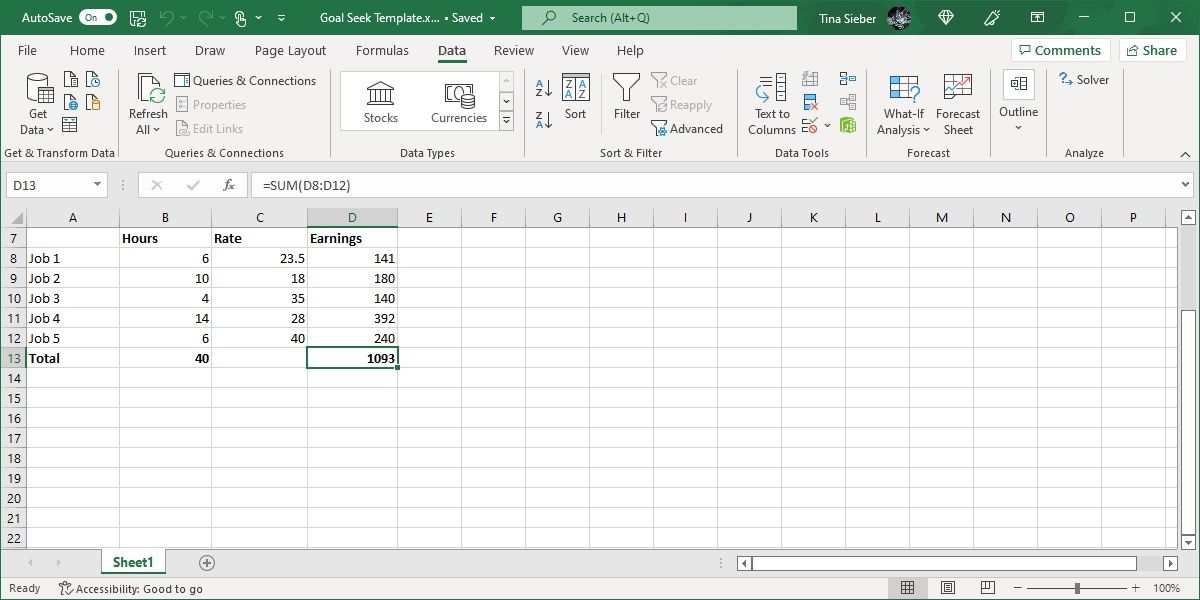
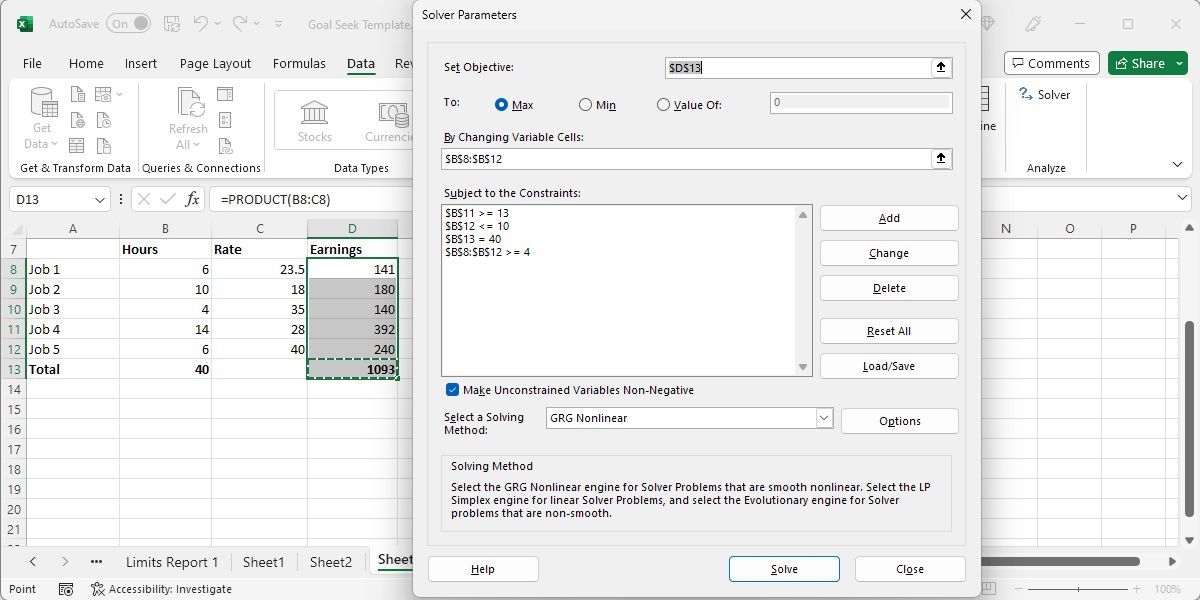
As an example, let’s say you have five part-time jobs with different pay rates and hours worked. You want to maximize your total pay while adhering to certain hourly constraints. There are also some rules which will be the constraints:
- No jobs can fall below four hours.
- Job 4 must be greater than 12 hours.
- Job 5 must be less than eleven hours.
- The total hours worked must be equal to 40.
Same as Goal Seek, it is best to use Solver on a copy of your data. This is even more important, as Solver can modify multiple cells.
Now open Solver and follow the steps below:
- Set the objective by selecting the cell that calculates total pay. Choose whether to maximize, minimize, or set a specific value. In this example, choose Max.
- Select the variable cells that Solver can adjust, like the hours worked at each job.
- Add constraints, like making sure no job falls below 4 hours, or that total hours worked equals 40. Use the Add button to define these.
- Hit Solve.
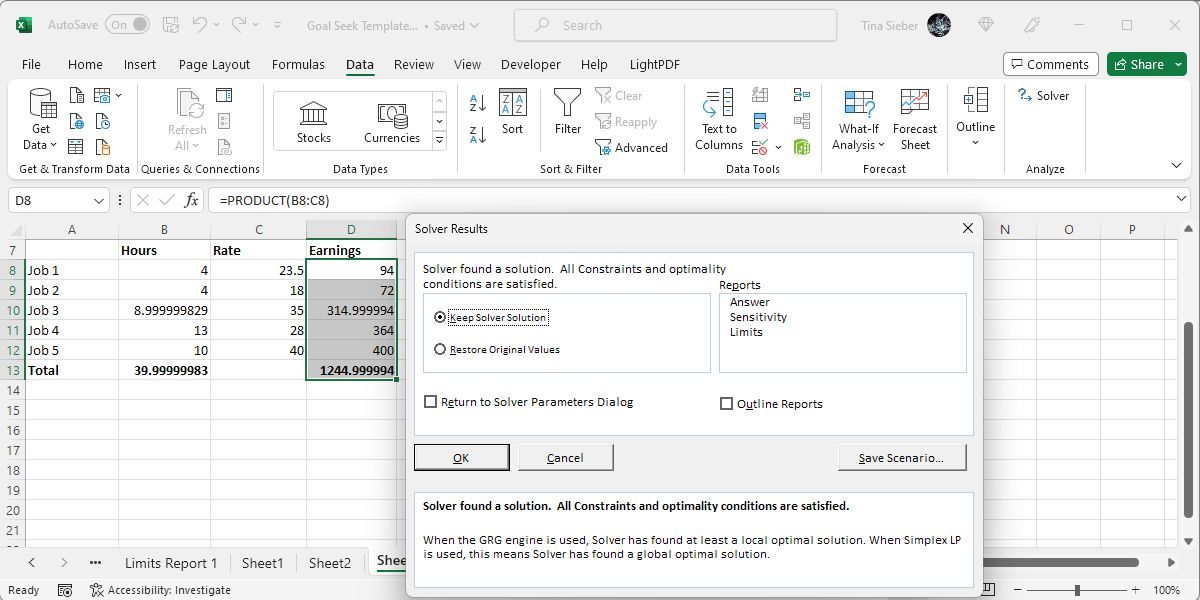
Solver found a solution! In this example, the imaginary earnings have increased by $152. And all the constraints have been met.
To keep the new values, make sure Keep Solver Solution is checked and hit OK. If you want more information, though, you can select a report from the right side of the window. Select all the reports that you want, tell Excel whether you want them outlined (I recommend it), and hit OK.
Now that you’re comfortable with the basics of solving for unknown variables in Excel, an entirely new world of spreadsheet calculation is open to you. Goal Seek can help you save time by making some calculations faster, and Solver adds a huge amount of power to Excel’s calculating abilities.
It’s just a matter of getting comfortable with them. The more you use them, the more useful they’ll become!
